Your Browsing History
Meet Your Seller
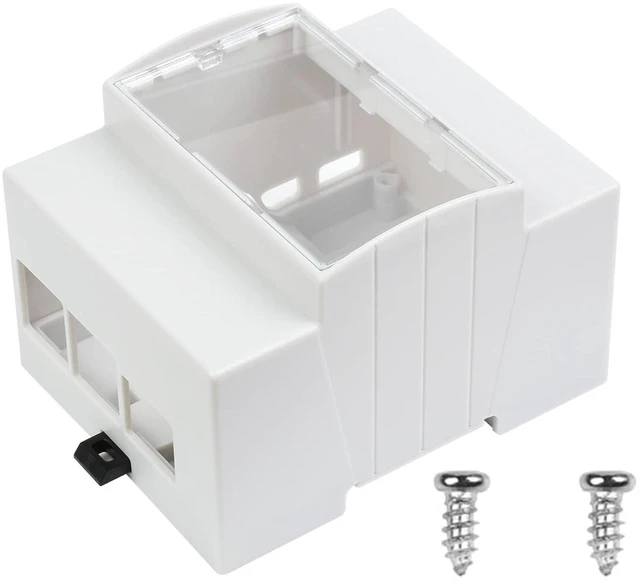
Raspberry Pi 4 Case, DIN Rail ABS Case for Raspberry Pi 4, Large Inner Space, In
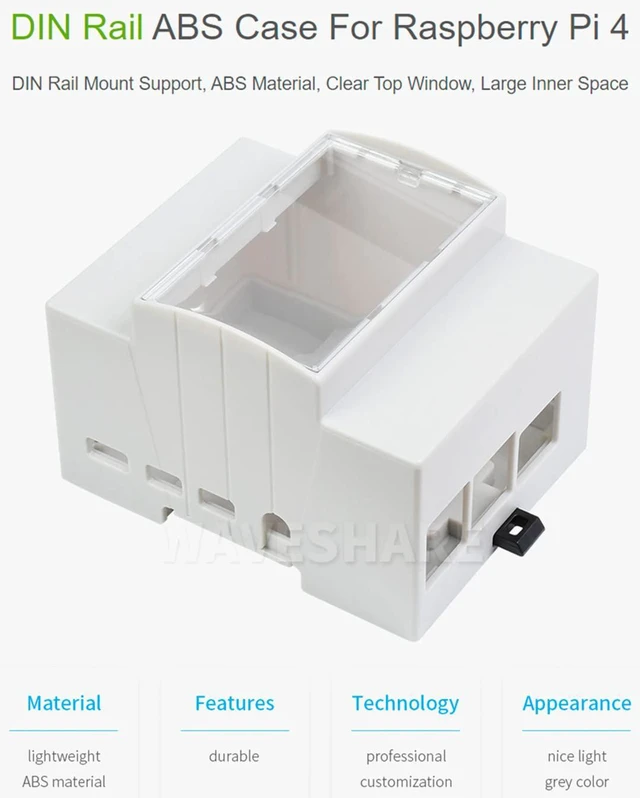
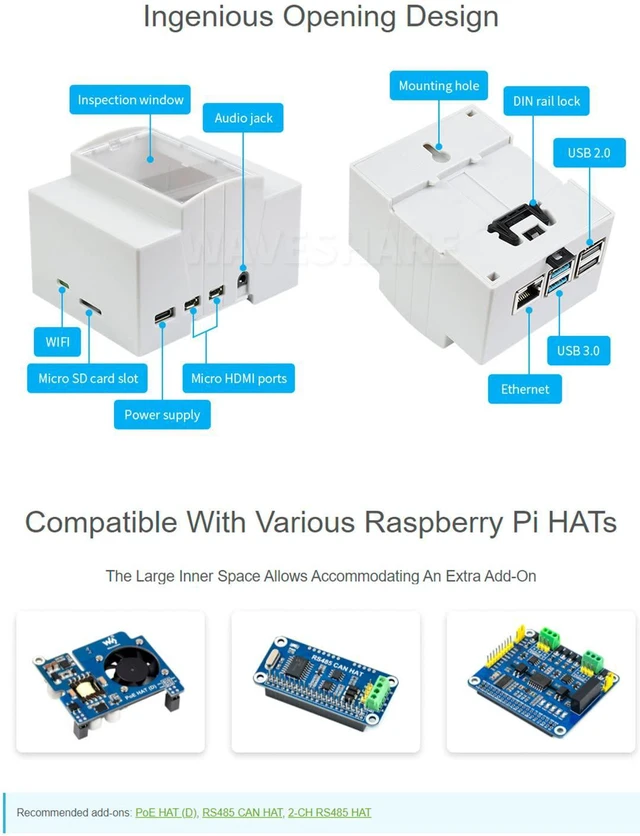
- DIN rail ABS Case for Raspberry Pi 4: DIN rail mount support, ABS material, clear top window, large inner space
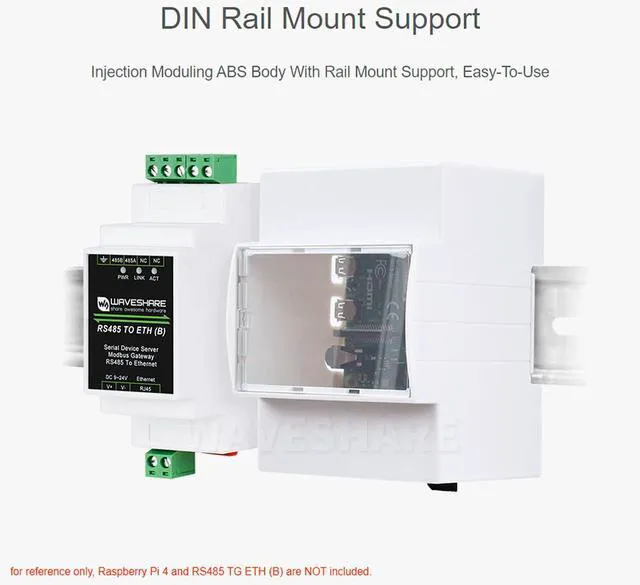
- DIN rail mount support injection moduling ABS body with rail mount support, easy-to-use
- Compatible with various Raspberry Pi HATs the large inner space allows accommodating an extra add-on,such as PoE HAT (D), RS485 CAN HAT, 2-CH RS485 HAT, PI-FAN-3007
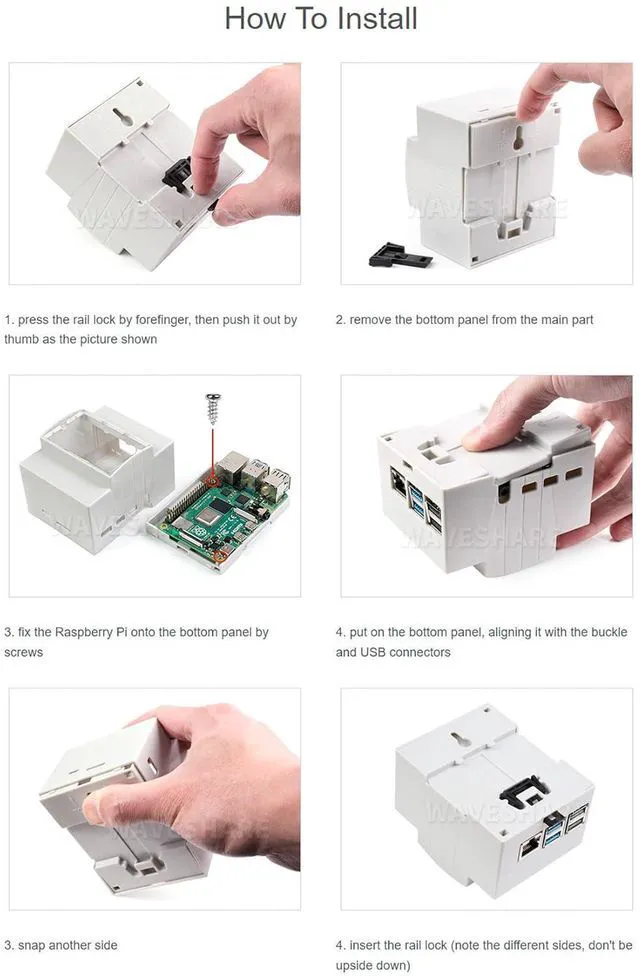
- How to install: 1. press the rail lock by forefinger, then push it out by thumb as the picture shown. 2. remove the bottom panel from the main part. 3. fix the Raspberry Pi onto the bottom panel by screws. 4. put on the bottom panel, aligning it with the buckle and USB connectors. 5. snap another side. 6. insert the rail lock (note the different sides, don't be upside down)

+
+
Overview
Specs
Reviews
Any questions? Our AI mode will help you find out quickly.
Try me now
DIN rail ABS Case for
Raspberry Pi 4: DIN rail mount support, ABS material, clear top window, large inner space
DIN rail mount support injection moduling ABS body with rail mount support, easy-to-use
Compatible with various Raspberry Pi HATs the large inner space allows accommodating an extra add-on, such as PoE HAT (D), RS485 CAN HAT, 2-CH RS485 HAT, PI-FAN-3007
How to install: 1. press the rail lock by forefinger, then push it out by thumb as the picture shown. 2. remove the bottom panel from the main part. 3. fix the Raspberry Pi onto the bottom panel by screws. 4. put on the bottom panel, aligning it with the buckle and USB connectors. 5. snap another side. 6. insert the rail lock (note the different sides, don't be upside down)
Raspberry Pi 4: DIN rail mount support, ABS material, clear top window, large inner space
DIN rail mount support injection moduling ABS body with rail mount support, easy-to-use
Compatible with various Raspberry Pi HATs the large inner space allows accommodating an extra add-on, such as PoE HAT (D), RS485 CAN HAT, 2-CH RS485 HAT, PI-FAN-3007
How to install: 1. press the rail lock by forefinger, then push it out by thumb as the picture shown. 2. remove the bottom panel from the main part. 3. fix the Raspberry Pi onto the bottom panel by screws. 4. put on the bottom panel, aligning it with the buckle and USB connectors. 5. snap another side. 6. insert the rail lock (note the different sides, don't be upside down)
Warranty & Returns
Warranty, Returns, And Additional Information
Warranty
- Please contact the Seller directly for warranty information. Warranty information may also be found on the Manufacturer's website.
- CONTACT
Return Policies
- Return for refund within: 30 days
- Return for replacement within: 30 days
- This item is covered by GearZap Return Policy
Manufacturer Contact Info
- For a directory of all our manufacturers, please click below.
- Manufacturers Directory
LOADING...