Your Browsing History

Meet Your Seller
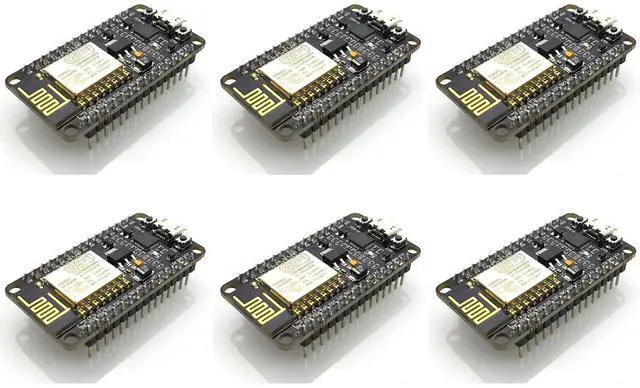


hiBCTR 6 Pieces ESP8266 NodeMCU CP2102 ESP-12E Development Board Open Source Serial Module Works Great for Arduino IDE/Micropython (Large)
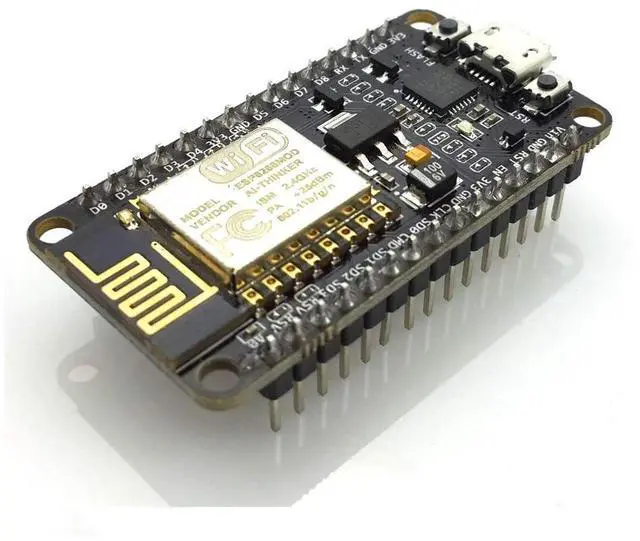
- Product DescriptionThe ESP8266 is a highly integrated chip engineered for the new interconnected world, offering a comprehensive standalone network solution that enables application hosting or offloading from another application processor.
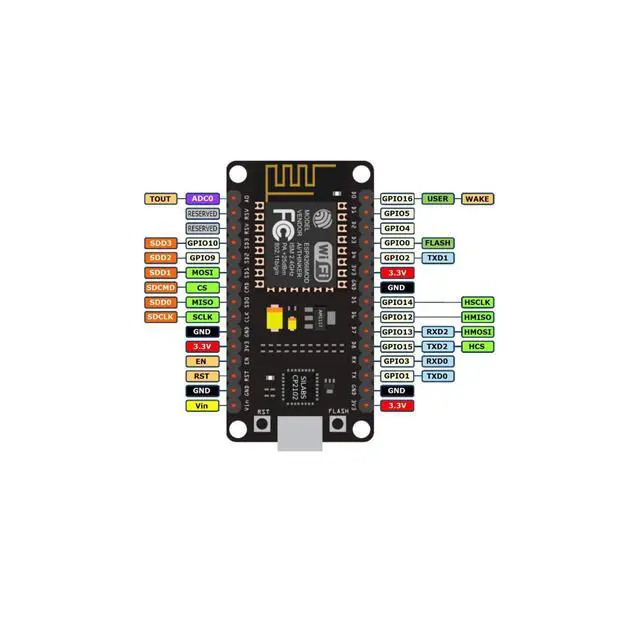
- IDE SetupDownload and install the latest Arduino IDE. Go to File -> Preferences, copy the URL arduino.esp8266.com/stable/package_esp8266com_index.json for the ESP Board Manager extension.
- Board ConfigurationIn the Arduino IDE, navigate to Tools > Board > Board Manager, type "esp8266", download and install the community esp8266. Configure the chip settings: Tools -> Board -> NodeMCU 1.0 (ESP-12E Module), Tools -> Flash Size -> 4M (3M SPIFFS), Tools -> CPU Frequency -> 80 Mhz, Tools -> Upload Speed -> 921600, and Tools Port -> (as appropriate).
- Flashing ProcedureOn Github (search for nodemcu/nodemcu-flasher/tree/master/), visit github.com/nodemcu/nodemcu-flasher/tree/master/Win32/Release or download and run the 64-bit fla
+
+
Overview
Specs
Reviews
Any questions? Our AI mode will help you find out quickly.
Try me now
Product DescriptionThe ESP8266 is a highly integrated chip engineered for the new interconnected world, offering a comprehensive standalone network solution that enables application hosting or offloading from another application processor. ^^ IDE SetupDownload and install the latest Arduino IDE. Go to File -> Preferences, copy the URL arduino. esp8266. com/stable/package_esp8266com_index. json for the ESP Board Manager extension. ^^ Board ConfigurationIn the Arduino IDE, navigate to Tools > Board > Board Manager, type "esp8266", download and install the community esp8266.
Configure the chip settings: Tools -> Board -> NodeMCU 1.0 (ESP-12E Module), Tools -> Flash Size -> 4M (3M SPIFFS), Tools -> CPU Frequency -> 80 Mhz, Tools -> Upload Speed -> 921600, and Tools Port -> (as appropriate). ^^ Flashing ProcedureOn Github (search for nodemcu/nodemcu-flasher/tree/master/), visit github. com/nodemcu/nodemcu-flasher/tree/master/Win32/Release or download and run the 64-bit flasher exe from github. com/nodemcu/nodod. emcu-flasemcu-Her/tree/Master/Win64/Release. ^^ Program Execution and SupportIn the Arduino IDE, locate the classic Blink program, load, compile, and upload it via File > Examples > ESP8266 > Blink. Contact us if you need drivers or encounter issues, as we offer 100% satisfactory service.
Configure the chip settings: Tools -> Board -> NodeMCU 1.0 (ESP-12E Module), Tools -> Flash Size -> 4M (3M SPIFFS), Tools -> CPU Frequency -> 80 Mhz, Tools -> Upload Speed -> 921600, and Tools Port -> (as appropriate). ^^ Flashing ProcedureOn Github (search for nodemcu/nodemcu-flasher/tree/master/), visit github. com/nodemcu/nodemcu-flasher/tree/master/Win32/Release or download and run the 64-bit flasher exe from github. com/nodemcu/nodod. emcu-flasemcu-Her/tree/Master/Win64/Release. ^^ Program Execution and SupportIn the Arduino IDE, locate the classic Blink program, load, compile, and upload it via File > Examples > ESP8266 > Blink. Contact us if you need drivers or encounter issues, as we offer 100% satisfactory service.
Warranty & Returns
Warranty, Returns, And Additional Information
Warranty
- Please contact the Seller directly for warranty information. Warranty information may also be found on the Manufacturer's website.
- CONTACT
Return Policies
- Return for refund within: 30 days
- Return for replacement within: 30 days
- This item is covered by HyperCore Return Policy
Manufacturer Contact Info
- For a directory of all our manufacturers, please click below.
- Manufacturers Directory
LOADING...