

Your Browsing History
- Free 30-day Returns
$74.99

Meet Your Seller

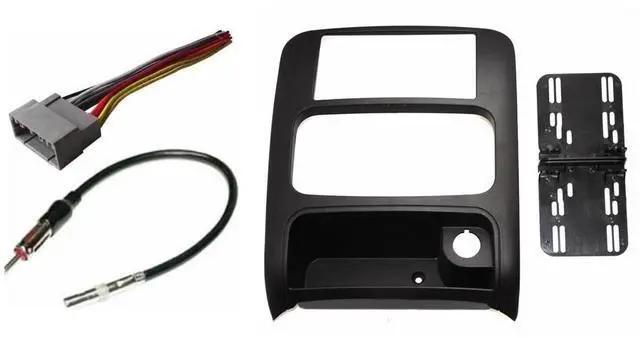
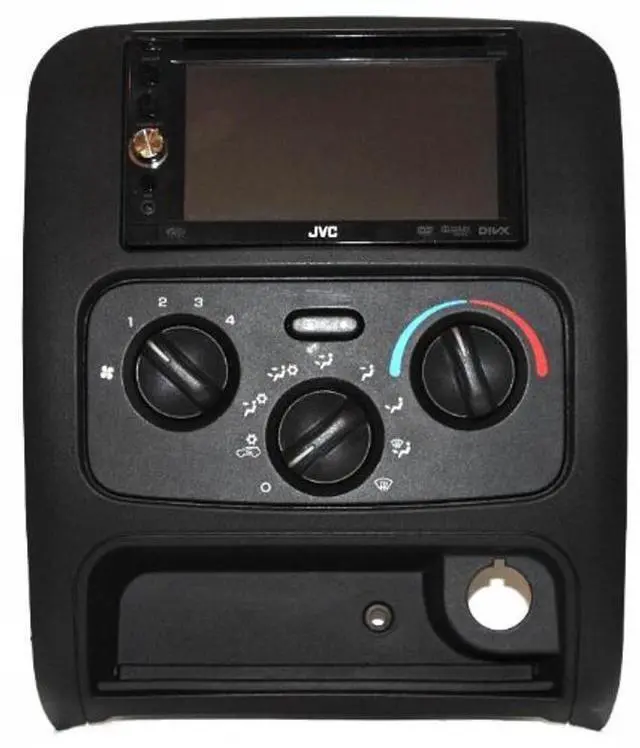
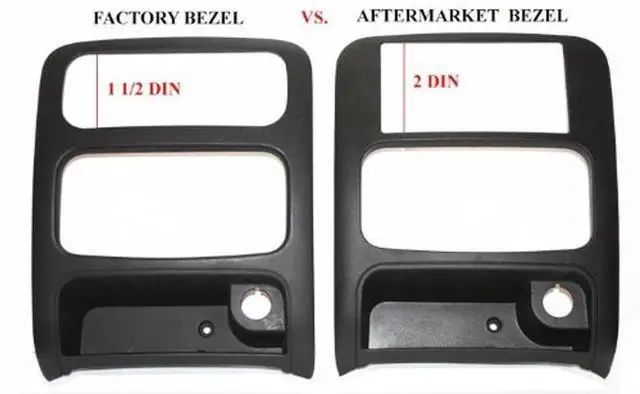


Aftermarket Double Din Stereo Installation Dash Kit Bezel + Standard Wire Harness & Antenna Adapter Compatible with Jeep Liberty 2003-2007
- Aftermarket Double Din Stereo Installation Dash Kit Bezel + Standard Wire Harness & Antenna Adapter Compatible with Jeep Liberty 2003-2007
+
+
Overview
Specs
Reviews

Any questions? Our AI mode will help you find out quickly.
Try me now
Finally a Double Din Radio installation solution for the Jeep Liberty 2003-2007
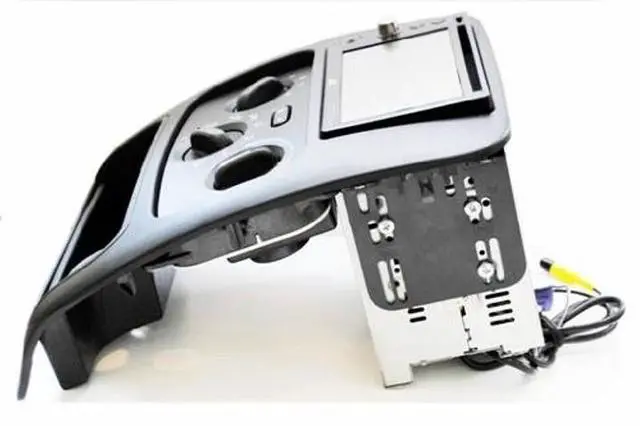
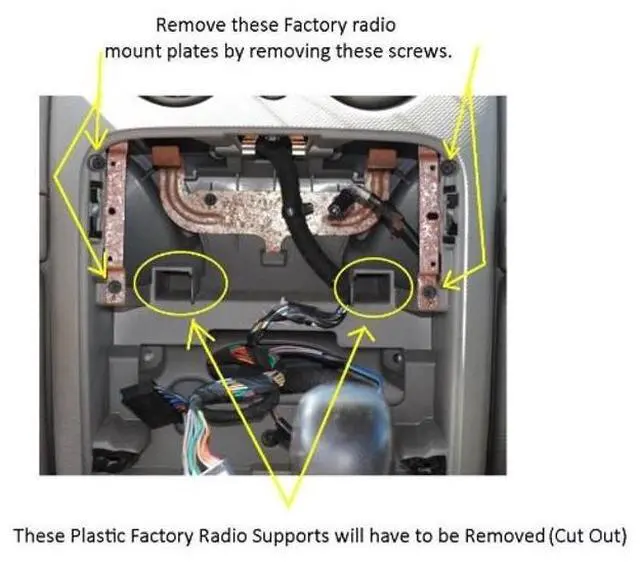
Installation Directions: 1. In the lower pocket area remove the one screw located in the center 2. Pry out on the factory bezel and separate it from the dash 3. Disconnect AC harness and the cigarette lighter 4. Remove the 4 Philip screws that hold the radio in place 5. Pull radio forward and disconnect the wire harness and antenna 6. Unmount the AC system from the factory bezel by removing the 4 Philip screws 7. Reattach that to the new double din bezel 8. Remove the old factory cigarette lighter and install on new double din bezel 9. Slide out the pocket liner and install on the new double din bezel 10. Remove radio supports by removing the 4 Philips (see picture gallery) 11. Use a drimmel or other plastic cutting device to remove the necessary plastic from the inside of the dash (see picture gallery) 12. Take the new bezel brackets and loosely attach to the new double din bezel 13. Dry fit your aftermarket double din radio into the bezel and remove/add any necessary trim rings/cages 14. Then line up aftermarket radio with the brackets and loosely screw through the brackets into the radio 15.
Slide the aftermarket radio forward and back until you achieve a clean finish 16. Making sure the aftermarket radio is its square tighten all screws 17. Wire in the aftermarket radio to the aftermarket harness 18. Install antenna adapter 19. Reconnect the AC controls and lighter button with harnesses in the dash 20. Plug aftermarket wire harness into the factory radio harness. 21. Snap bezel into place and secure final screw in lower pocket area.
Installation Directions: 1. In the lower pocket area remove the one screw located in the center 2. Pry out on the factory bezel and separate it from the dash 3. Disconnect AC harness and the cigarette lighter 4. Remove the 4 Philip screws that hold the radio in place 5. Pull radio forward and disconnect the wire harness and antenna 6. Unmount the AC system from the factory bezel by removing the 4 Philip screws 7. Reattach that to the new double din bezel 8. Remove the old factory cigarette lighter and install on new double din bezel 9. Slide out the pocket liner and install on the new double din bezel 10. Remove radio supports by removing the 4 Philips (see picture gallery) 11. Use a drimmel or other plastic cutting device to remove the necessary plastic from the inside of the dash (see picture gallery) 12. Take the new bezel brackets and loosely attach to the new double din bezel 13. Dry fit your aftermarket double din radio into the bezel and remove/add any necessary trim rings/cages 14. Then line up aftermarket radio with the brackets and loosely screw through the brackets into the radio 15.
Slide the aftermarket radio forward and back until you achieve a clean finish 16. Making sure the aftermarket radio is its square tighten all screws 17. Wire in the aftermarket radio to the aftermarket harness 18. Install antenna adapter 19. Reconnect the AC controls and lighter button with harnesses in the dash 20. Plug aftermarket wire harness into the factory radio harness. 21. Snap bezel into place and secure final screw in lower pocket area.
Warranty & Returns
Warranty, Returns, And Additional Information
Warranty
- Please contact the Seller directly for warranty information. Warranty information may also be found on the Manufacturer's website.
- CONTACT
Return Policies
- Return for refund within: 30 days
- Return for replacement within: 30 days
- This item is covered by To the Internet media Return Policy
Manufacturer Contact Info
- For a directory of all our manufacturers, please click below.
- Manufacturers Directory
LOADING...