Your Browsing History
- Free 30-day Returns
$289.00

Meet Your Seller


Dayton Audio APA150 150W Power Amplifier
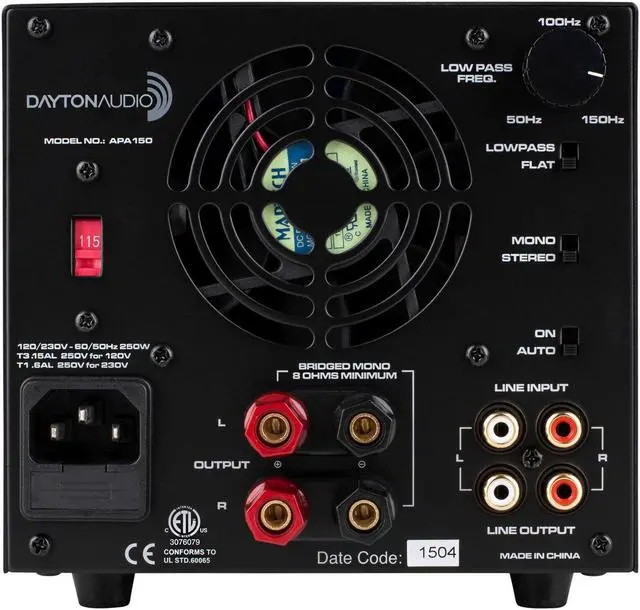
- Key features of the APA150 include high current, discrete power transistors (used in premium amp designs), a hefty toroidal power supply transformer, low-noise forced air cooling, a fully adjustableand defeatableelectronic 50-150 Hz low-pass filter (18 dB/octave), and complete protection against electrical shorting and thermal overload. Also included are auto-on/off, silent turn-off with no audible transient, gold plated RCA inputs/outputs, and 5-way binding posts.
- Features and Specifications: Measured power output: 2 x 75 watts RMS (into 4 ohms @ less than 0.01% THD) Signal-to-noise ratio: greater than 100 dB Class A/B design topology Input sensitivity: 1 V Input impedance: 47k ohms Auto-on sensitivity: 3 mV Voltage requirement: 120/230 VAC, 60/50 Hz Dimensions: 5.6'' H x 5.7'' W x 12.8'' D.
+
+
Overview
Specs
Reviews
Any questions? Our AI beta will help you find out quickly.
Try me now
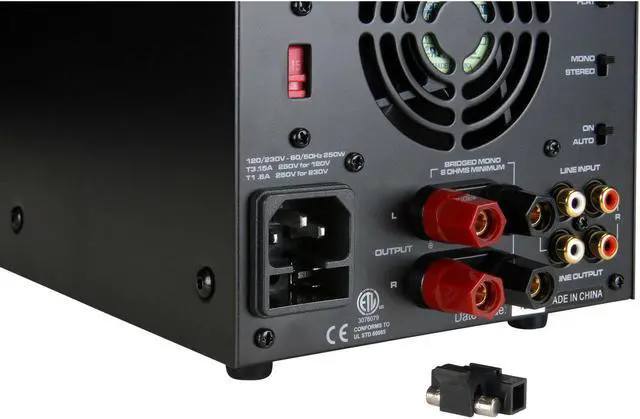
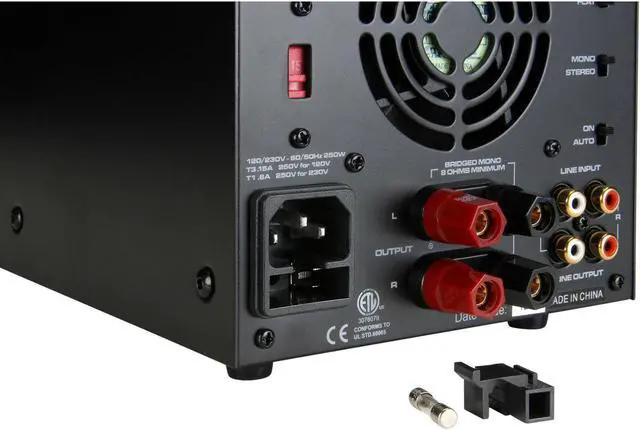
CONNECTING THE APA150 Connecting a line-level device 1. Locate the RCA line-level output from your source device. 2. Using RCA patch cables, connect the appropriate channel from the source output to the amplifier input. 3. For a mono line-level signal, use the left-level input. Daisy-Chaining APA150s 1. Connect the line-level input from source device as above. 2. Connect the line-level output from first amplifier to line level input on the second amplifier. Using the APA150s Low-Pass Filter 1. Ensure Low Pass-Flat switch is set to Low Pass.
2. Connect line-level input from source device. 3. Connect loud speakers as described below. 4. Adjust crossover frequency until desired output is reached. Connecting Your Loudspeakers for Stereo Operation 1. Ensure that the amplifier is powered down. 2. Remove approximately 1/2'' of the insulation from your speaker cables' positive and negative conductors. 3. Loosen the speaker binding posts by turning the knobs counter-clockwise, exposing the wire insert hole. 4. Observing polarity, insert the conductors into their appropriate binding posts and tighten the knobs down, securing the conductors in place.
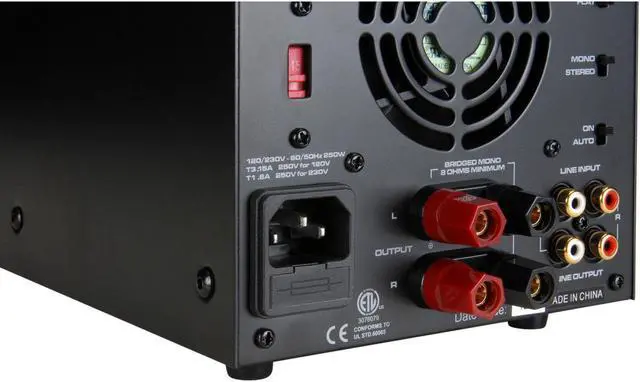
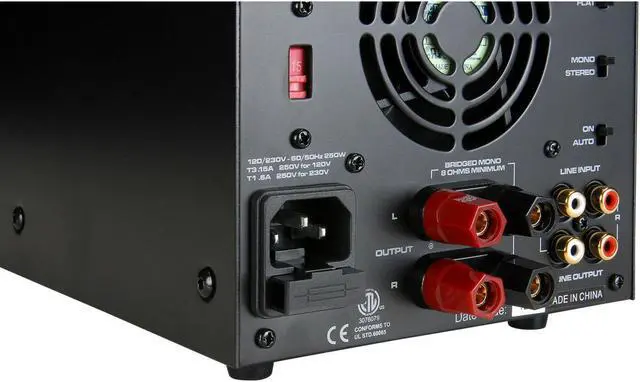
Connecting Your Loudspeakers for Bridged-Mono Operation 1. Set the Mono-Stereo switch to Mono position. 2. Remove approximately 1/2'' of insulation from your speaker cables' positive and negative conductors. 3. Loosen speaker binding posts by turning the knobs counter-clockwise, exposing the wire insert hole. 4. Connect positive conductor to top left binding post. 5. Connect negative conductor to bottom right binding post. Highlights Sleek modern design looks good and sounds great Virtually noise-free fan operation for near field applications High current, discrete output transistors that run cool and quiet
2. Connect line-level input from source device. 3. Connect loud speakers as described below. 4. Adjust crossover frequency until desired output is reached. Connecting Your Loudspeakers for Stereo Operation 1. Ensure that the amplifier is powered down. 2. Remove approximately 1/2'' of the insulation from your speaker cables' positive and negative conductors. 3. Loosen the speaker binding posts by turning the knobs counter-clockwise, exposing the wire insert hole. 4. Observing polarity, insert the conductors into their appropriate binding posts and tighten the knobs down, securing the conductors in place.
Connecting Your Loudspeakers for Bridged-Mono Operation 1. Set the Mono-Stereo switch to Mono position. 2. Remove approximately 1/2'' of insulation from your speaker cables' positive and negative conductors. 3. Loosen speaker binding posts by turning the knobs counter-clockwise, exposing the wire insert hole. 4. Connect positive conductor to top left binding post. 5. Connect negative conductor to bottom right binding post. Highlights Sleek modern design looks good and sounds great Virtually noise-free fan operation for near field applications High current, discrete output transistors that run cool and quiet
Warranty & Returns
Warranty, Returns, And Additional Information
Warranty
- Please contact the Seller directly for warranty information. Warranty information may also be found on the Manufacturer's website.
- CONTACT
Return Policies
- Return for refund within: 30 days
- Return for replacement within: 30 days
- This item is covered by B-IN Electronics Return Policy
Manufacturer Contact Info
- For a directory of all our manufacturers, please click below.
- Manufacturers Directory
LOADING...