Long Range Transmission Distance - Up to 2km (visible unobstructed environment), actual application distance should be less than 2KM. Built-in 10DBi directional antenna can significantly improve the transmission and reception performance of wireless signals. Trees will not block the transmission speed of the wireless bridge, suitable for warehouses or garages next to your house
Widely Applications - Any place required cameras Point to Point/Multi-Point connection Client Bridge for Elevator Monitornetworks. Outdoor CPE Connect an IP Wireless Camera to a secondary port and utilize its long-range connectivity to send video back through the wireless network for extended coverage
Built for Outdoor Wi-Fi Coverage - IP66-rated weatherproof housing that ensures continued operation on harsh outdoor environments or in climates of extreme cold, heat or continuous moisture. Lightning Protection, Waterproof, Dustproof, Antifreeze, High-Temperature Resistant, With software-enabled PoE output, the secondary Ethernet port can power an external device, such as a PoE security camera, for seamless IP video integration
Why choose brand is an audio, video& network device provider and technical solutions facilitator with manufacture, sales and supports all in one. Providing competitive wireless network devices for customers all over the world.
Long Range Point to Point Wireless Bridge for Starlink Internet ExtensionExtend your Starlink internet access seamlessly from one location to another without the need for cables, allowing you to share your home internet with your garage, barn, stable, warehouse, or workshop. Monitor multiple remote home security cameras simultaneously from the control room.
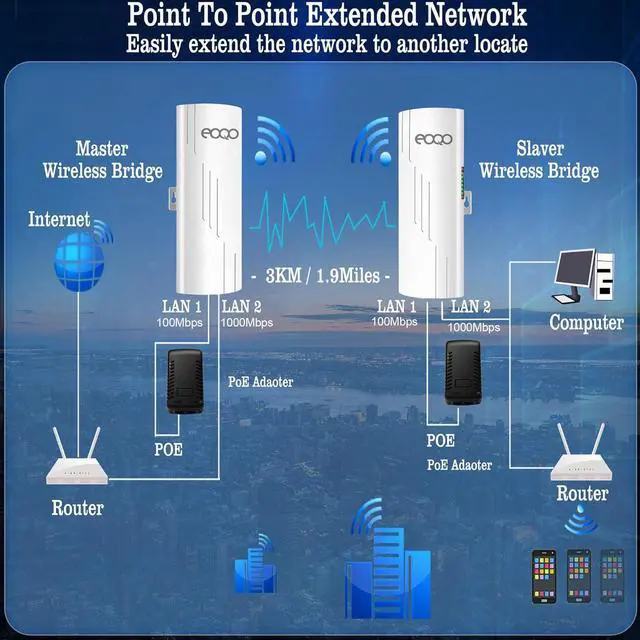
Application A: Point to Point Internet ExtensionExtend your home internet coverage to multiple locations, allowing you to share the same network seamlessly with your garage, barn, stable, warehouse, workshop, and other outbuildings.
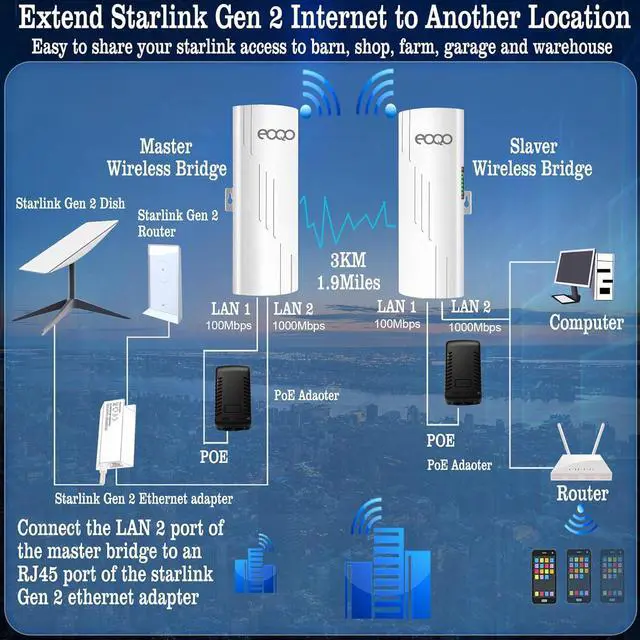
Application B: Expand Starlink Gen 2 internet to another locationTo extend your Starlink Gen 2 internet to another location, connect the master bridge to the Starlink Gen 2 Ethernet adapter and the dish. Then, connect the slave bridge to your router or computer. This setup allows you to easily share your Starlink Gen 2 satellite internet access to other location.
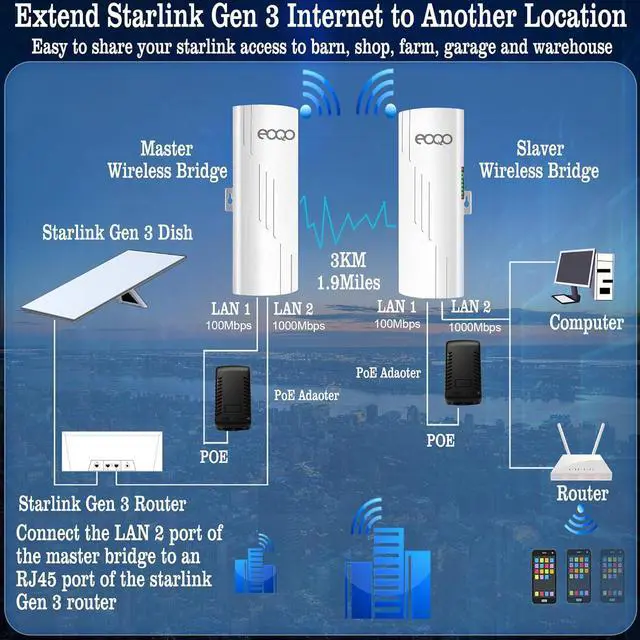
Application C: Expand Starlink Gen 3 internet to another locationTo extend your Starlink Gen 3 internet to another location, connect the master bridge to the Starlink Gen 3 router and the dish. Then, connect the slave bridge to your router or computer. This setup allows you to easily share your Starlink Gen 3 satellite internet access to other location.
Application E: Point to point video surveillanceEasily monitor multiple remote home security cameras simultaneously from the control room using a wireless bridgeeliminating the need for extensive cabling and simplifying installation.
Application F: Point to multiple share Starlink internet to multiple locationExtend your Starlink internet to multiple locationsgarage, barn, stable, warehouse, shopand share the same network across all sites to save on costs.
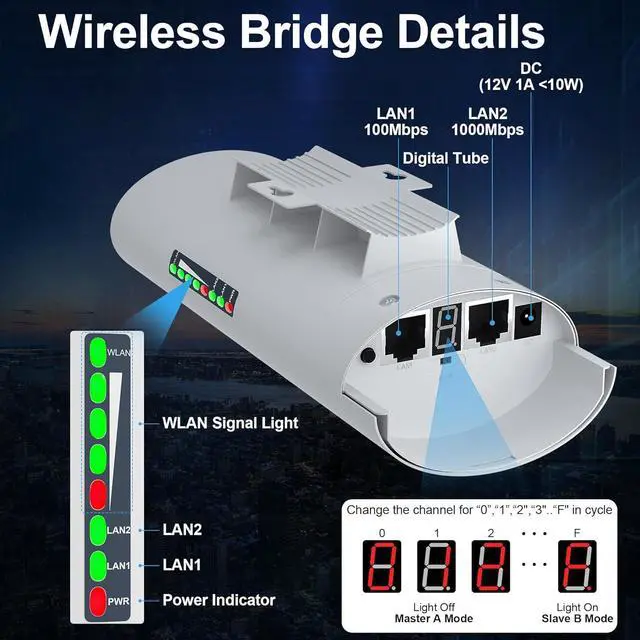
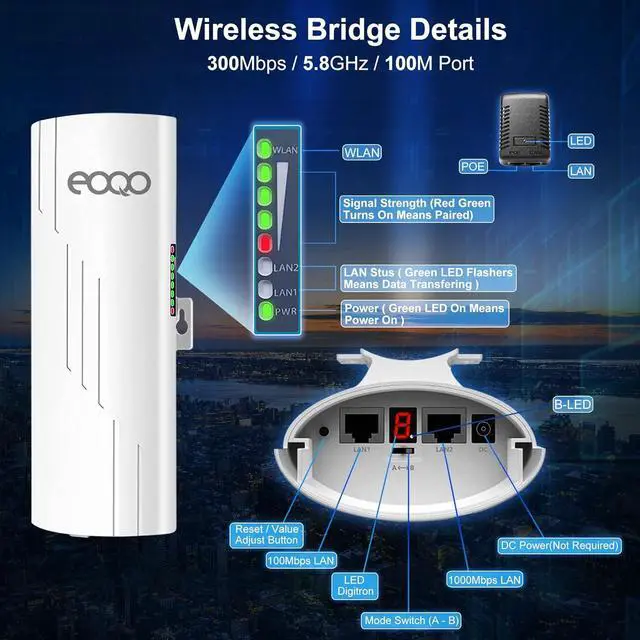
Set up the A- B Mode Switch to position A, set the bridge to Master mode, and set the opposite side to Master mode.
Master Bridge Setup The master bridge connection detail guide
Slave Bridge Setup The slave bridge connection detail guide
Two power method The bridges can be powered by a 24V PoE injector, or a 12V 1000mA solar panel.
Installation Method The wireless bridge can be installed on a wall or pole. Please purchase
ASIN: B0B7H9Z85B separately.
Installation Guide