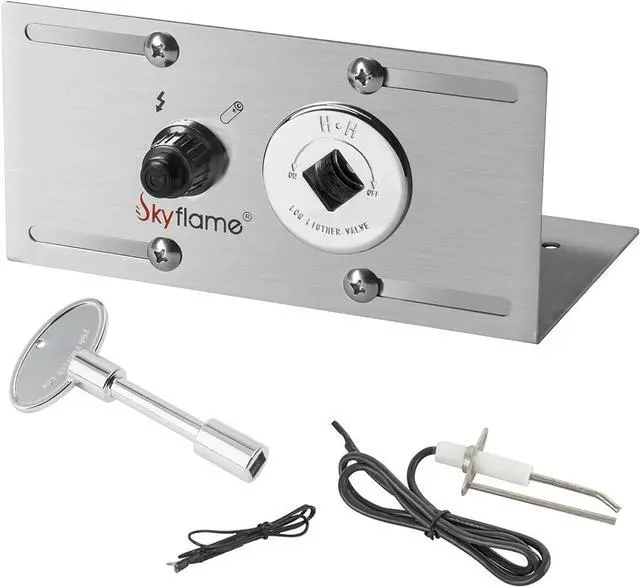
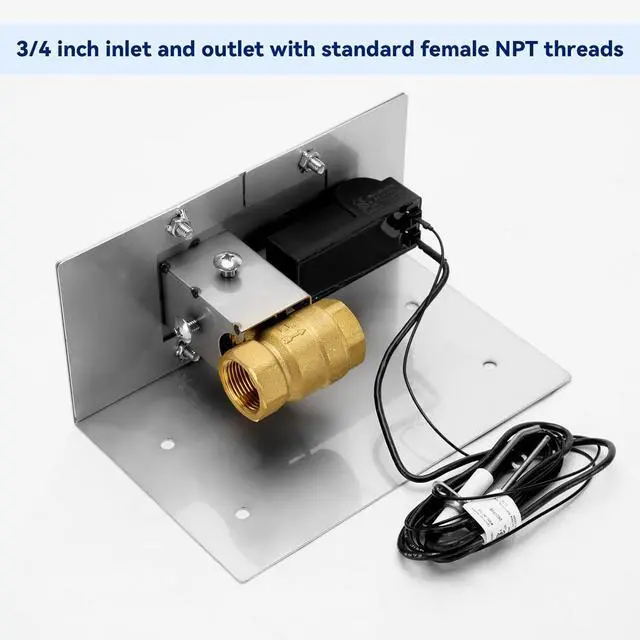
Kit contains Chrome Ball Valve with 3 Chrome Key, Spark Ignitor with Leads & Ground Wire, Stainless Steel Igniter Panel
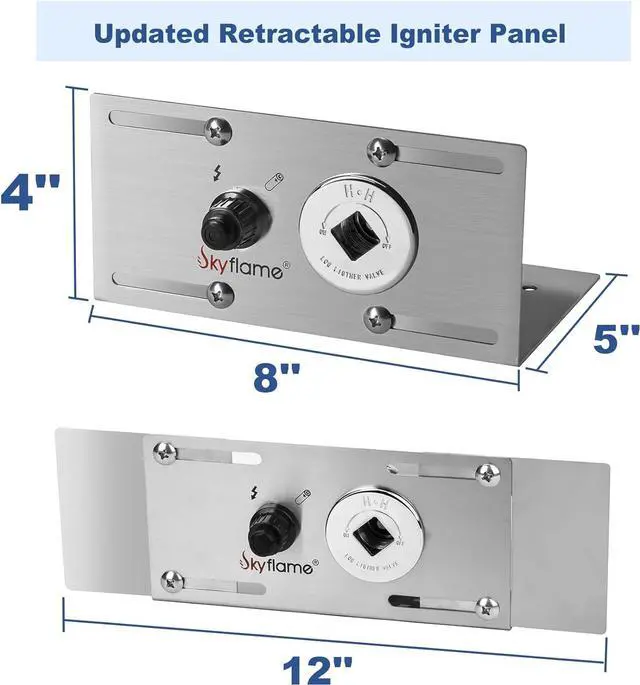
Dimensions of the Base Plate: 4" H*5" W, Face
Plate: 8" L*4" H; Face Plate can be extended to a maximum extension of 12 inches
Product Description
Extensive Rated BTU
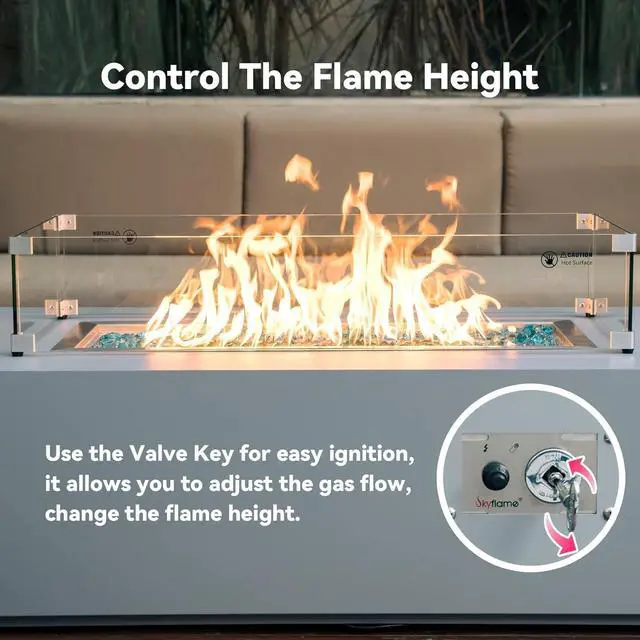
Our fire pit gas burner spark ignition kit for use with natural gas or liquid propane fuels, rated at 300, 000 BTU, significantly enhances gas combustion efficiency for better flame appearance.
Type: Accessory
Style: Universal
Appearence: Classic Black Colored
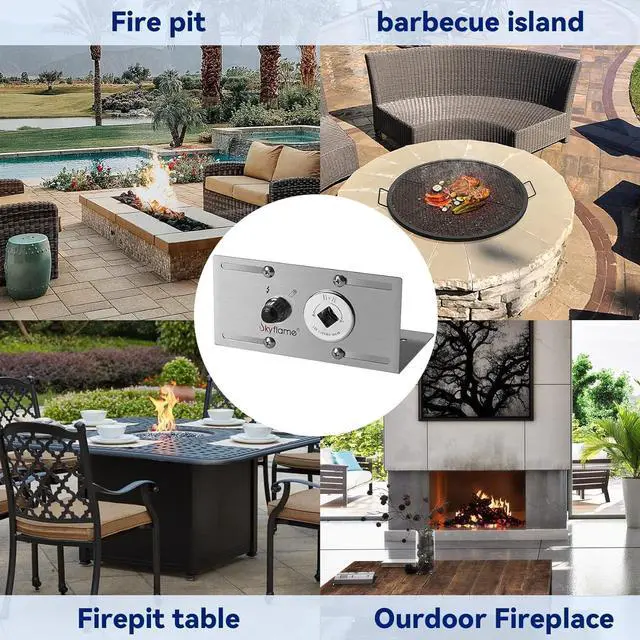
Location: Indoor | Outdoor
Applicability: Natural Gas or Liquid Propane Fuels
Detailed Design: Extendable Nounting Plate
Skyflame Fire Pit Spark Ignition Kit
Including Push Button Igniter Gas Shut-Off Valve with Key
The ignition kit includes flat black ball valve with 3 key, spark ignitor with leads & ground wire, stainless steel mounting plate.
Tips
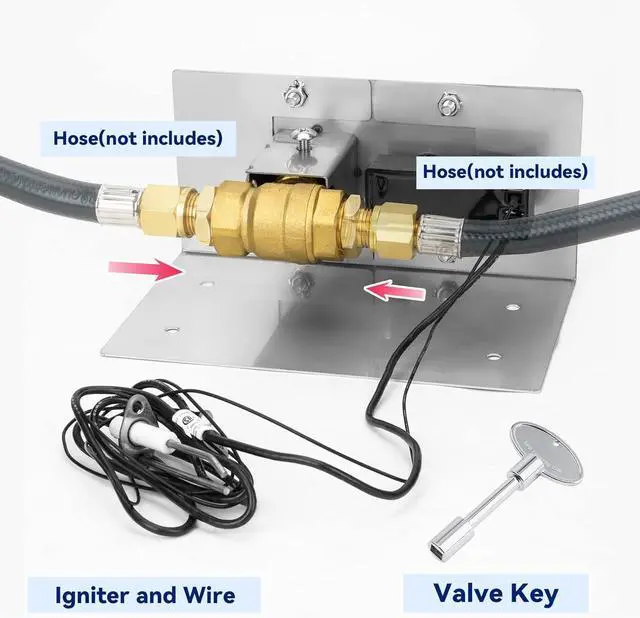
The key to a good installation is the ground. You must screw igniter bracket solidly and directly to the burner pan. Keep the igniter area relatively clear of embers, rocks, Fireglass, ect.
You can create a void around the igniter using a screen. This void will fill with gas and ignite much easier than an igniter covered in fire glass, ect.
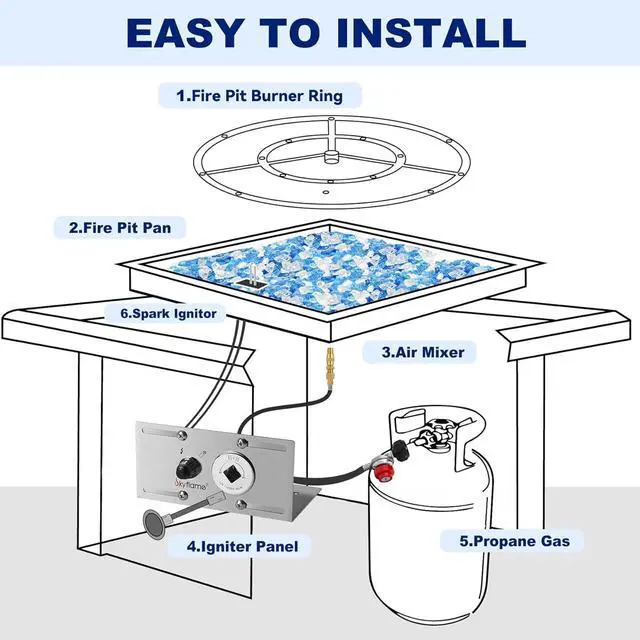
Tips for Installation
1. Run both wires up through the pan from the bottom.
2. Mount the sparker close as possible to one of the outer gas holes.
3. Make sure that you sandwich one wire between the pan and the bracket for good ground.
4. The other ends connect to the push button block.
5. Insert the battery and push the button.