

Your Browsing History

Meet Your Seller

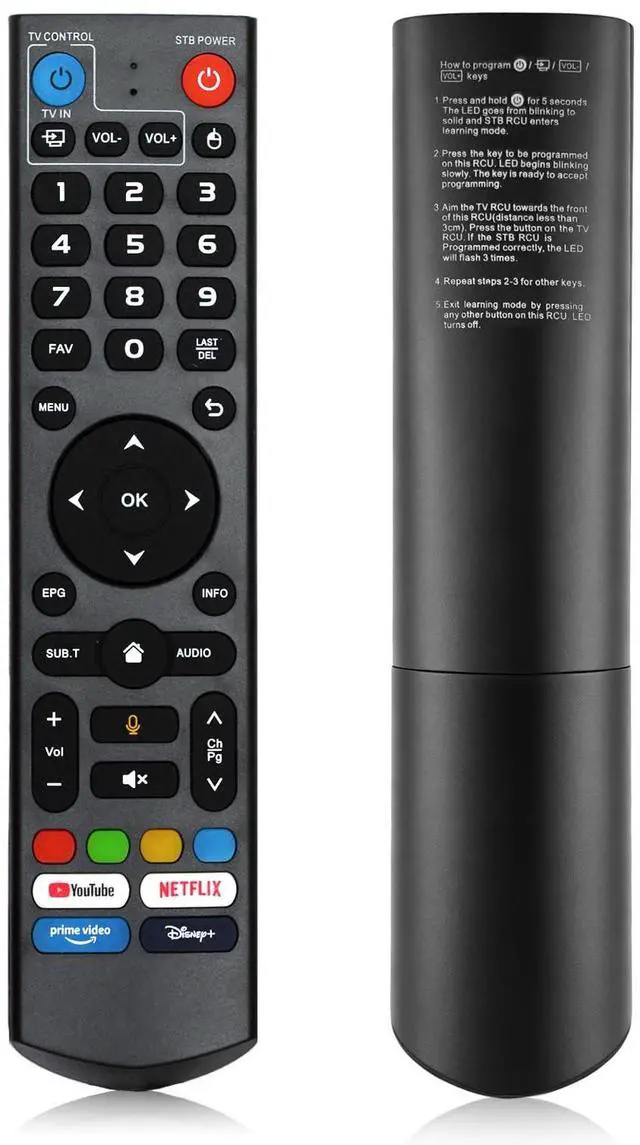
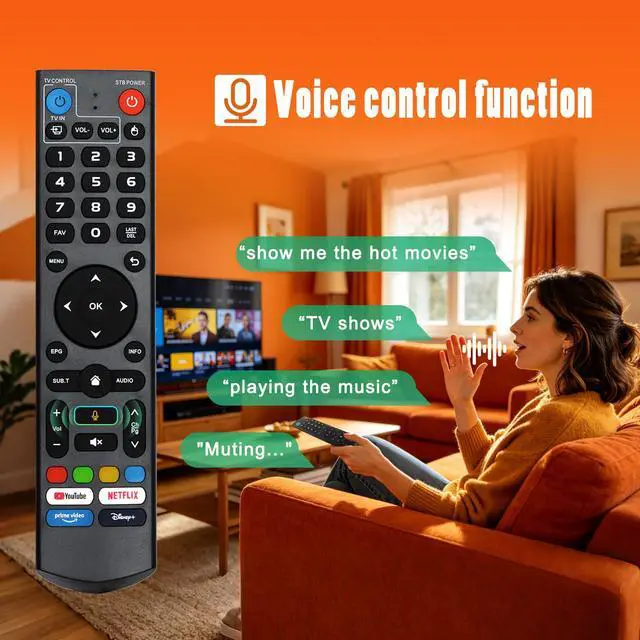


Replacement V3 Pro Voice Remote Control Compatible with vSeeBox V5 Pro / V3 Plus/V3 / V2 / V1 Pro/V1 Max/Elite/Max(Without Backlight Function)
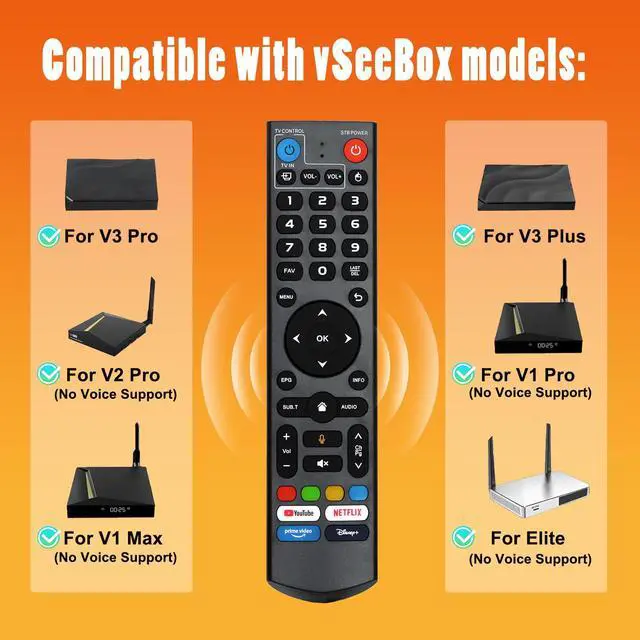
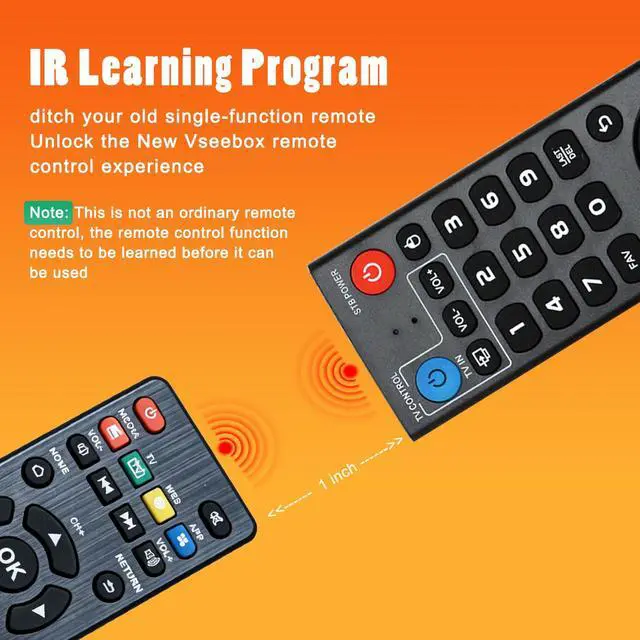
- Please verify that your device model is included in the following list. This V3 Pro voice remote control works with several vSeeBox models, such as vSeeBox V5 Pro, V3 Plus, V3 Pro, V2 Pro, V1 Pro, V1 Max, Elite, and Max. Note: The models that lack voice command functionality are V1 Max, V1 Pro, and V2 Pro. Please follow these steps for programming: 1. Press and hold the [POWER] key for 5 seconds. The LED light will change from flashing to a steady glow, and the set-top box RCU will enter learning mode. 2. Press the key on this RCU that you to program. The LED will start to flash slowly, showing the key is ready for programming. 3. Point the TV RCU directly at this RCU (within 3cm) and press the corresponding button on the TV RCU. If programmed successfully, the LED will flash three times. 4. Repeat steps 2-3 for other keys. To exit learning mode, press any other button on the RCU. The LED will turn off. This remote control employs robust connection technology, providing quick pairing, consistent stability, and an expanded range for a user-friendly connection process. It offers two working modes: V3 working mode and V2 working mode. To switch modes, press and hold the "5" number key for over 10 seconds. The indicator light will flash, confirming the mode switch is complete. The V3 Pro working mode is for the V3 Pro model. The V2 Pro working mode is for V1 Pro, V2 Pro, Max, and Elite models. (Note: The remote control is set to V3 working mode by default.) To use this V3 remot
+
+
Overview
Specs
Reviews

Any questions? Our AI mode will help you find out quickly.
Try me now
Please verify that your device model is included in the following list. This V3 Pro voice remote control works with several vSeeBox models, such as vSeeBox V5 Pro, V3 Plus, V3 Pro, V2 Pro, V1 Pro, V1 Max, Elite, and Max.
Note: The models that lack voice command functionality are V1 Max, V1 Pro, and V2 Pro. Please follow these steps for programming: 1. Press and hold the [POWER] key for 5 seconds. The LED light will change from flashing to a steady glow, and the set-top box RCU will enter learning mode. 2. Press the key on this RCU that you to program. The LED will start to flash slowly, showing the key is ready for programming. 3. Point the TV RCU directly at this RCU (within 3cm) and press the corresponding button on the TV RCU. If programmed successfully, the LED will flash three times. 4. Repeat steps 2-3 for other keys. To exit learning mode, press any other button on the RCU. The LED will turn off. This remote control employs robust connection technology, providing quick pairing, consistent stability, and an expanded range for a user-friendly connection process.
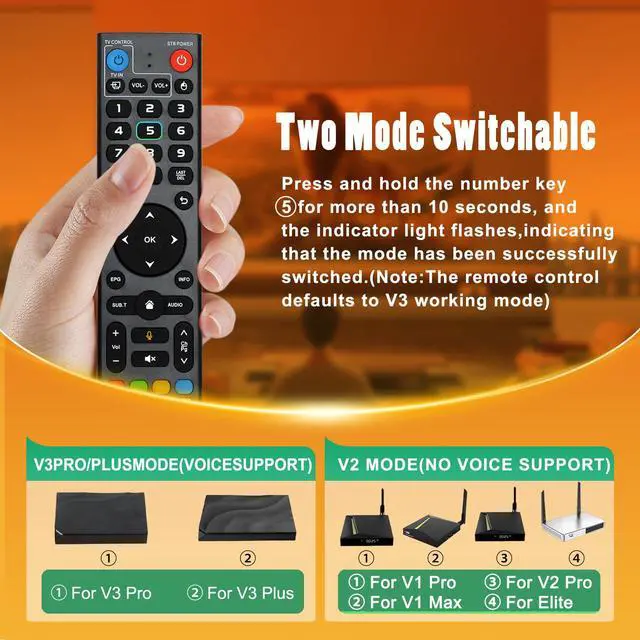
It offers two working modes: V3 working mode and V2 working mode. To switch modes, press and hold the "5" number key for over 10 seconds. The indicator light will flash, confirming the mode switch is complete. The V3 Pro working mode is for the V3 Pro model. The V2 Pro working mode is for V1 Pro, V2 Pro, Max, and Elite models.
(Note: The remote control is set to V3 working mode by default. ) To use this V3 remote control on V1 Pro, V2 Pro, Max, or
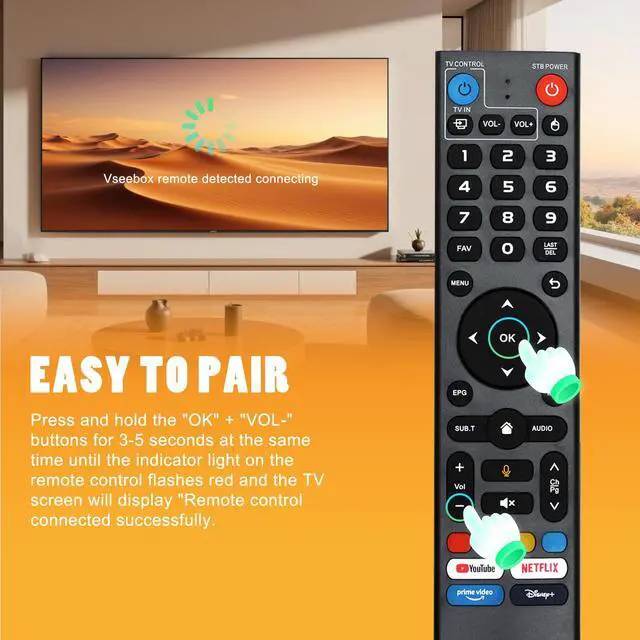
Elite models: Press and hold the OK key and the volume-down key together for about 5 seconds until the indicator light flashes steadily, which activates the remote's Bluetooth function. Then, navigate to "System Settings > Bluetooth > Pair New Device" on your device, locate the remote control, and connect. If not found, confirm Bluetooth is enabled by pressing and holding the OK and volume-down keys on the remote again
Note: The models that lack voice command functionality are V1 Max, V1 Pro, and V2 Pro. Please follow these steps for programming: 1. Press and hold the [POWER] key for 5 seconds. The LED light will change from flashing to a steady glow, and the set-top box RCU will enter learning mode. 2. Press the key on this RCU that you to program. The LED will start to flash slowly, showing the key is ready for programming. 3. Point the TV RCU directly at this RCU (within 3cm) and press the corresponding button on the TV RCU. If programmed successfully, the LED will flash three times. 4. Repeat steps 2-3 for other keys. To exit learning mode, press any other button on the RCU. The LED will turn off. This remote control employs robust connection technology, providing quick pairing, consistent stability, and an expanded range for a user-friendly connection process.
It offers two working modes: V3 working mode and V2 working mode. To switch modes, press and hold the "5" number key for over 10 seconds. The indicator light will flash, confirming the mode switch is complete. The V3 Pro working mode is for the V3 Pro model. The V2 Pro working mode is for V1 Pro, V2 Pro, Max, and Elite models.
(Note: The remote control is set to V3 working mode by default. ) To use this V3 remote control on V1 Pro, V2 Pro, Max, or
Elite models: Press and hold the OK key and the volume-down key together for about 5 seconds until the indicator light flashes steadily, which activates the remote's Bluetooth function. Then, navigate to "System Settings > Bluetooth > Pair New Device" on your device, locate the remote control, and connect. If not found, confirm Bluetooth is enabled by pressing and holding the OK and volume-down keys on the remote again
Warranty & Returns
Warranty, Returns, And Additional Information
Warranty
- Please contact the Seller directly for warranty information. Warranty information may also be found on the Manufacturer's website.
- CONTACT
Return Policies
- Return for refund within: 30 days
- Return for replacement within: 30 days
- This item is covered by Pingquan Store Return Policy
Manufacturer Contact Info
- For a directory of all our manufacturers, please click below.
- Manufacturers Directory
LOADING...