Your Browsing History
 WDS200T4X0E")
 TM8FFE004T0C129")


Any questions? Our AI beta will help you find out quickly.
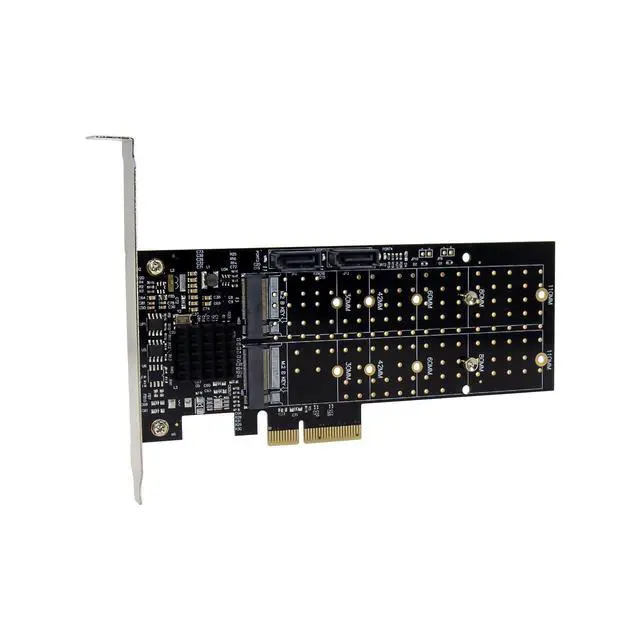
Compliant with PCI-Express Specification V2.0 and backward Compatible with PCI-Express 1.x
Compliant with Serial ATA Specification 3.1
PCI Express x2 interface and compatible with PCI Express X4 ,X8 and X16 slots
Supports communication speeds of 6Gbps,3Gbps,1.5Gbps
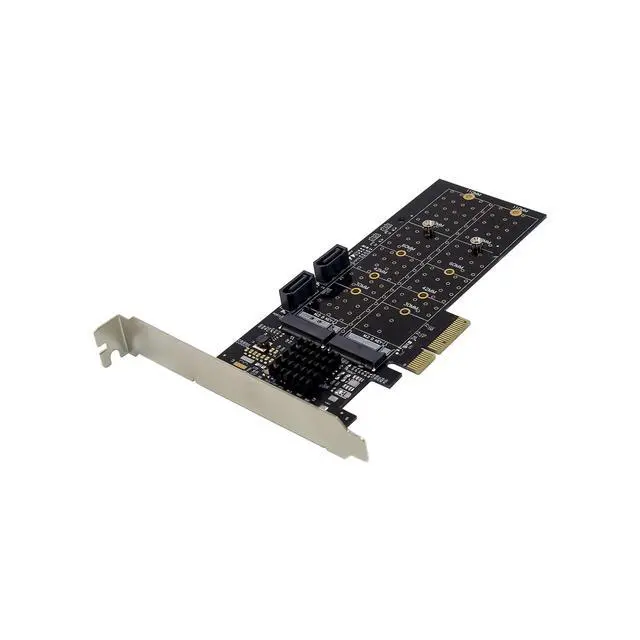
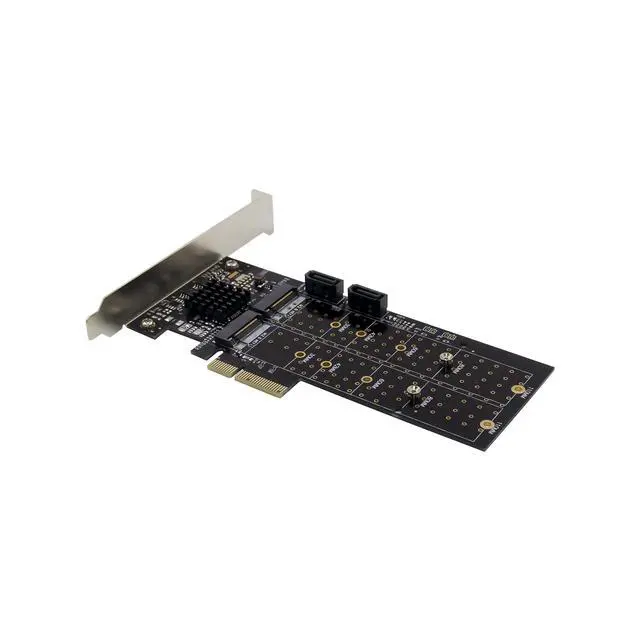
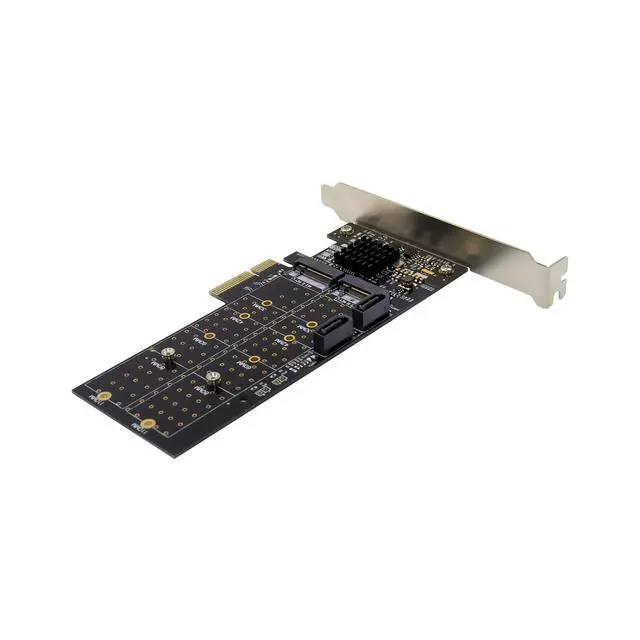
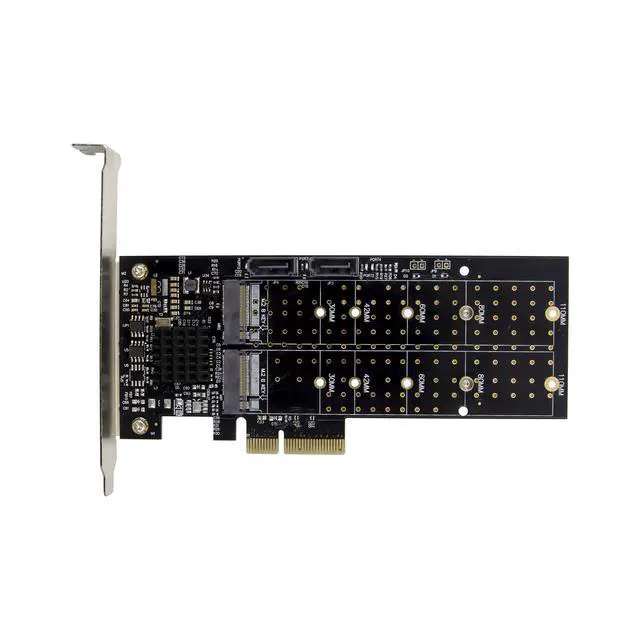
Support 2xSerial ATA Port and 2x M.2 B KEY port
M.2 B Key support SATA protocol SSD
M.2 B Key support SSD size:2230,2242,2260,2280,22110
Hot plug and Hot Swap
Support Native Command Queue(NCQ)
Support Port Multiplier FIS based switching or command based switching
Compatible with SATA6G,3G and 1.5G hard drives
Support RAID function: RAID0, RAID1, RAID10, and HyperDuo
Drivers support for Window XP/VISTA/Win7/Win8/Server2003/server2008 R2,Linux2.6.x and above
Package content
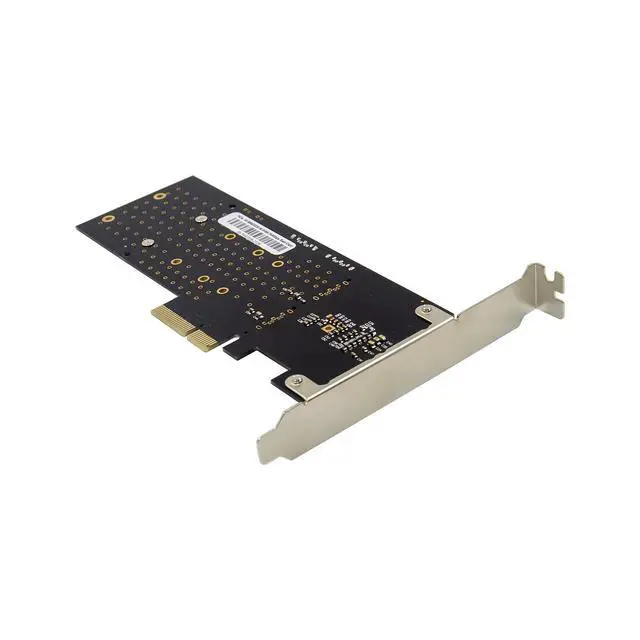
1 x PCIe Marvell 88SE9230 SATA6Gbps RAID CARD
1 x Users Manual
2 x SATA Cable
1 x CD Driver
1 x Low profile bracket
Accessories
System Requirements
Supports windows xp /Vista/Win7/Win8/Server2003/Server2008 R2.Linux2.6.x and above
One available PCI Express x4/x8/x16 slot
Hardware installation
1.Turn off the power to your computer
2.Unplug the power cord and remove your computers cover
3.Locate TO an empty PCI Express x4/x8/x16 slot on the motherboard.
4.To install the board, carefully align the cards bus connector with the selected PCI-E slot on the motherboard .Push the board down firmly
5.Attach your internal device to the SATAIII PCI-E controller card
6.Replace the Slot brackets holding screw to secure the card
7.Replace the computer cover and reconnect the power cord
Marvell BIOS Utility for RAID/HyperDuo setup
Warning: All the data on the hard disks connected to the controller card will be permanently erase in the following actions.
To create a RAID/HyperDuo virtual disk:
1.Power up you computer, skip this section if you are not going to create a RAID/HyperDuo virtual disk.
2.Press the [ctrl]+[M] key on the keyboard at the same time to enter the Marvell BIOS utility
3.Once the BIOS is entered, scroll to HBA: Marvell 0 in the topology pane by the up and arrow key on the keyboard and please Enter
4.Choose Configuration Wizard and press Enter to start creating the RAID/ HyperDuo virtual disk
5.Select the free physical disk available by using the arrow keys to scroll though the disks and press Space Bar. After selecting all the disks needed, press Enter to continue.
6.Choose the RAID Option:
RAID LEVEL: RAID 0- striping
RAID 1-Disk Mirroring
RAID 10-Stripe of mirrors
Stripe size: 32k, 64k
Name: any value for the user to input
7.Choose the HyperDuo option:
HyperDuo mode: Safe-mirrored protection
Capacity-cost-Optimized
Keep original data: Yes, No (only available in safe mode)
Preserve the data currently on your HDD or erase all data
Threshold (%):10-100 for the users to input
The number defines to percentage of your SSD the Bios users to optimize performance .Default is 90
8.Choose NEXT and press [Y] key to start creating the virtual disk
9.Press F10 and[Y] key to exit the Marvell bios utility
Note: A hyperDuo virtual disk must at least contain one SSD and one HDD
To rebuild a virtual disk
1.When a hard disk in a RAID 1 virtual disk or a SSD in a hyperDuo safe mode virtual disk is defective or the data inside are corrupted, the Marvell Bios Utility will mark the virtual disk as degrade.
2.Replace the defective hard disk /SSD with an identical hard disk/SSD or a hard disk /SSD which has a smaller size within the allowable value set for the virtual disk.
3.Press the [ctrl]+[M] key on the keyboard at the same time to enter the BIOS.
4.In the Topology pane. Scroll to the virtual disk, Press Enter and select the Rebuild option.
5.Select the available replacement hard disk /SSD to be rebuilt to by pressing Space Bar and then Enter
6.Press [Y] key to start. The utility will show the rebuild status and the completed percentage. This will take a long time to finish the whole process and it depends on the size to be rebuilt
Note: HyperDuo virtual disk created in safe mode can be partially rebuilt if the SSD fails, but not if the HDD fails.
Marvell Storage Utility (MSU) for RAID/HyperDuo setup
The Marvell storage utility is a browser-based management utility for Marvell 88SE92XX controllers. It creates and manages a RAID or HyperDuo virtual using storage devices connected to the 88SE92XX controller.
1.Start windows and insert the driver CD in to the CD-ROM Driver, assume driver A.
2.Brows to the following folder on the driver CD:
A:\Marvell\92xx\MSU\
3.Run MSUSetup.exe to start utility installation.
4.Follow the on-screen instructions to install the MSU
5.Double click the desktop shortcut for the MSU .When opening the MSU in some versions of windows , internet explorer may detect a problem with the security certificate for the MSU web .page. Select Continue to this website (not recommended) to continue opening the MSU
6. Operating the MSU will take you to a login page. if you have no password, leave this field blank, and then click Login.
7. After entering the MSU user interface select Adapter , which contains four physical disks, assume four physical disks are connected to the controller card
8. Roll over the operation tab and you will see Create HyperDuo, Create RAID and Quick Create Wizard
9. To create a HyperDuo virtual disk you should have at least one HDD and one/Multiple SSD.
10. Select create HyperDuo, and then select Safe mode or Capacity mode.
11. Check Keep Original Data to preserve the data currently on you HDD or Uncheck it to erase all data.
This option is only available in safe mode.
12. Enter a number between 10 and 100 in the threshold (%) filed, the threshold (%)number defines the percentage of your SSD the MSU user to optimize performance, the default is 90
13.press submit .the MSU displays the property tab for the HyperDuo virtual disk and begins initialization. it takes up to some minutes to complete. System performance may slow during this period.
14. if you want to quickly create a HyperDuo virtual disk, select quick create wizard.
15. Select Safe mode or capacity mode and then press submit the MSU will help you create the HyperDuo virtual disk automatically.
16.To create a RAID virtual disk, select create RAI ,then select RAID LEVEL:RAID0,RAID 1,OR RAID10.
17.Choose enough available physical disks (RAID0 needs at least two physical disks, RIAD 1 just needs
two physical disks, and RAID 10 needs four physical disks )and press Next.
18.Enter the name for the virtual disk , or you can use the default name.
19.Select the Initialization method for the virtual disk
20.Select the stripe Size 32k or 64k for the virtual disk.
21.Press Submit. the MSU create the virtual disk and displays the Property tab for the new virtual disk.
22.Restart your computer to use the virtual disk.
Driver installation
For Windows Vista, Server 2008 ,Win7,Win8,server 2008 R2 Operating Systems:
1.Start windows and insert the driver CD into the CD-ROM drive, assume drive A.
2.Windows will automatically detect the SATA card , Right-click Marvell console ATA Device with yellow mark in the Other Devices and select Update Driver Software.
3.Select Browse my computer for driver software
4.Browse to the following folder on the driver CD according to your operating system:
-windows vista, server2008, windows7, windows 8 32-bit:
A:\2010A2\Marvell\92xx\windows vista_2008_7_8\i386
-windows vista, server 2008, windows7, windows8 64-bit and server 2008 R2:
A: \2010A2\Marvell\92xx\windows vista_2008_7_8\amd64
5.Follow the on-screen instruction to install the driver.
6.After successful installation, the device is list in the Device Manager as Marvell unify configuration(under system devices)
For Windows XP, SERVER 2003 operation system:
1.Start windows and insert driver CD into the CD-ROM drive, assume drive A
2.Windows will automatically detect the SATA card, select No ,not this time and click the NEXT button to continue
3.Select install from a list or specific location (Advance) and click on the Next button.
4.Browse to the following folder on the driver CD according to your operating system:
-Windows XP 32-bit and Server 2003 32-bit
A:\2010A2\Marvell\92XX\Windows2003_XP\i386
-Windows XP64-bit and server2003 64-bit:
A:\2010A2\Marvell\92XX\Windows2003_XP\amd64
5.Follow the on-screen instruction to install the driver.
6.After successful installation, The SATA controller is listed in the Device Manager as Marvell 92xx SATA 6G controller(under SCSI and RAID controllers)
7. For this controller an additional device Marvell Console SCSI Processer device is detected, select "No, not this time" and click the next button to continue
8. Select "install form a list or specific location (Advance)" and click on the Next button.
9. Browse to the following folder on the driver CD according to your operating system:
-Windows XP 32-bit and Server 2003 32-bit:
A:\2010A2\Marvell\92xx\Windows2003_xp\i386
-Windows xp 64-bit and server2003 64-bit:
A:\2010A2\Marvell\92xx\Windows2003_xp\amd64
10.follow the on-screen instruction to install the driver.
11. After successful installation, the device is listed in the Device Manager as Marvell Unify configuration(under system devices)
12.Once driver installation is completed, you can now connect your external devices to the SATA card. To install the driver for the external devices, please refer to the external device users mauanls.
For Linux OS
Linux distributions contain Inbox drivers for AHCI devices. The drivers are installed automatically during the Linux OS installation
