
Every August the same question fills PC building forums: I am moving into a dorm in a week, how do I get my desktop there in one piece? It is a fair worry. A modern gaming PC is a heavy, expensive object with a large graphics card cantilevered off a thin motherboard, and a two-hour drive on rough roads applies forces that no case was designed to absorb. The good news is that moving a desktop safely is a solved problem. It takes about forty minutes of preparation, a handful of inexpensive supplies and a short checklist. Here is the whole process, from backup to first boot in the new room.

Before You Touch Anything: Back Up
Padding protects the hardware, not the data. Drives are the one component where physical damage cannot be undone by reseating something, so a full backup is genuinely step one. Copy your documents, project files and game saves to an external drive or cloud storage before the PC leaves the desk. It takes an hour of waiting and removes the only failure mode with permanent consequences.
Step 1: Decide Whether the Case Is Part of the Problem

If you move between home and campus twice a year, or between a bedroom and a living room TV every weekend, a full-size tower is fighting you. A compact chassis with a genuine carrying handle is a different experience entirely. The Mechanic Master C34 is a good example: it accepts ITX, micro-ATX and ATX boards, takes a graphics card up to 335mm and a 240mm radiator, and has a removable integrated handle on a 2mm aluminum shell over a steel frame. Swapping cases is more work than one move, but if you carry your PC regularly it pays for itself.
Step 2: Unplug, Label and Coil Every Cable
Power down fully, switch off the power supply and unplug the wall cord. Then disconnect the monitor, keyboard, mouse, headset, speakers and Ethernet, and label each one as you go. Coil them individually rather than throwing them all in one bag — a knot of eight cables in a box is how display cables get bent connectors. Reusable hook-and-loop straps such as Nippon Labs 9-inch velcro ties keep each coil tidy and can be reused for cable management once you set up in the dorm.
Step 3: Remove the Graphics Card
This is the step people want to skip, and it is the most important one. Corsair’s guidance is direct: modern graphics cards are heavy enough that when a PC is bumped, the card’s weight makes it flex and puts strain on the PCIe slot. For a short careful trip across town you may get away with leaving it in. For a real move with a loaded car and highway miles, take it out.
You will need a screwdriver, and a proper kit is worth having on hand for the reassembly too — something like the Bailink 169-in-1 precision screwdriver set, which includes magnetic bit holders, extension rods and a wrist strap. Speaking of which: ground yourself first. iFixit’s guidance is to keep components in their protective bags until installation, remove rings and watches, avoid polyester clothing, and use a grounded strap such as the StarTech ESD anti-static wrist strap, which has a six-foot grounding cord. Their most important caveat: a wrist strap does nothing if it is not actually grounded.
While the card is out, this is the natural moment to add an anti-sag brace for the reinstall. A screw-mounted brace such as the Zalman VS2 GPU support bracket mounts to the power supply shroud or fan holes with no adhesive. Worth knowing what it does and does not do: Gamers Nexus measured a naturally sagging card and could not find a meaningful thermal difference, so the real argument for a brace is protecting the PCIe slot contacts and the card’s own circuit board, not temperatures.
Step 4: Bag and Pad the Parts You Removed
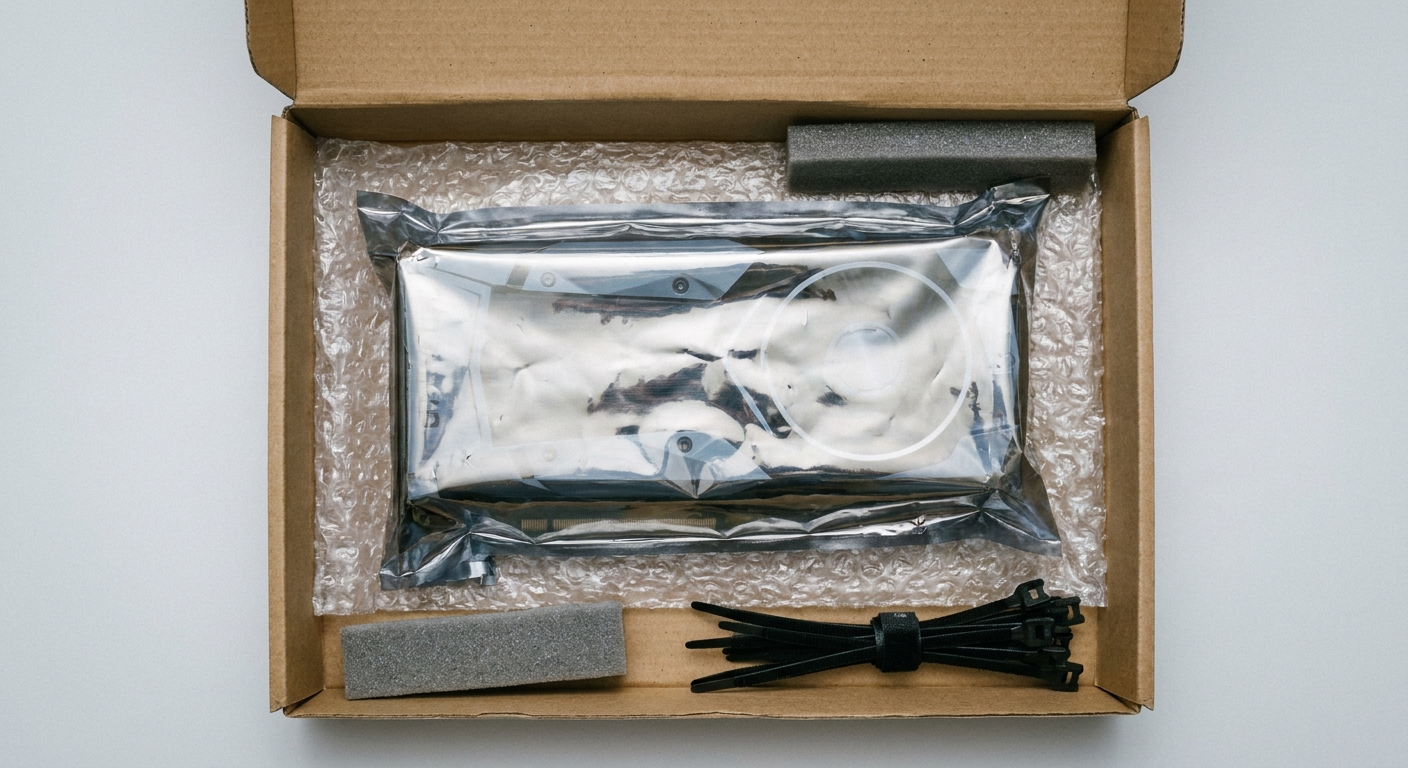
Seal the graphics card in an anti-static bag, then wrap it in bubble wrap and pack it in its own box — ideally the box it shipped in. A pack of resealable shielding bags such as the BONAEVER ESD resealable bags covers cards, drives and memory in assorted sizes and is useful long after the move.
What about the CPU cooler? Noctua publishes an actual threshold rather than a vague warning: they recommend removing coolers with a total weight over 700 grams including the fan before transport, and note they cannot be responsible for transport damage if a heavy heatsink is left installed. That covers most large dual-tower air coolers. All-in-one liquid coolers, by contrast, can stay mounted — both Noctua and Corsair say so, and only custom open loops warrant draining.
Step 5: Pack the Tower Itself
Leave the side panels on. The panels are the case’s structural shell and the surface your padding pushes against; tempered glass in particular should stay bolted in and be cushioned from the outside rather than carried loose. Then pad generously. Corsair’s baseline recommendation for a short car trip is the case’s original box with its foam inserts, stepping up to a hard case with cut foam for a valuable build. PC Gamer suggests bubble wrap around the case and a box-within-a-box with roughly five inches of cushioning on all sides.
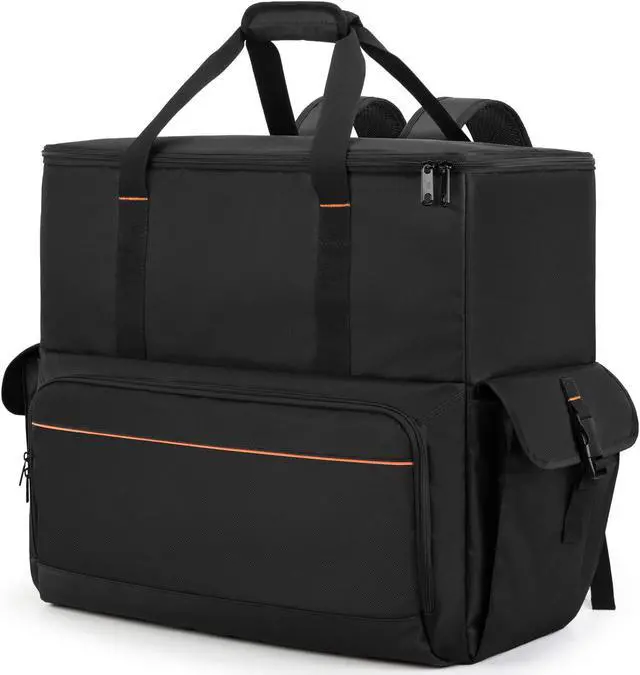
If you no longer have the original box, a purpose-made padded bag is the practical answer. The Trunab desktop tower carrying backpack has a foam-and-pearl-cotton lined interior sized for a mid-tower, padded shoulder straps, a top handle, a chest strap and pockets for the keyboard, mouse and cables — which also solves the “how do I get this up three flights of stairs” problem.
Step 6: How to Place It in the Car
Put the tower on the floor of the vehicle, lying horizontally with the motherboard side down, and wedge it in place with towels or blankets. The floor keeps it from launching forward in a hard stop, and motherboard-side-down means any remaining component weight presses into the board rather than hanging off it. Do not stack anything heavy on top, and do not put it on a seat where it can tip.
Step 7: Before the First Boot in the Dorm
Unpack, then do a short inspection before you press the power button. Reseat the graphics card firmly in the PCIe slot and refit the bracket screw. Reconnect its power cables. Check that the CPU cooler is still seated and that memory modules and drive cables have not walked loose. Then plug in — and plug into real surge protection rather than the outlet strip that came with the room. A metal-housed unit with a high joule rating and diagnostic LEDs, such as the Eaton Tripp Lite Isobar 6-outlet surge protector, is cheap insurance in an old building. Power on and listen.
One common post-move surprise: if an all-in-one cooler gurgles or rattles, that is trapped air, and it is fixable. Corsair’s support guidance is to run the pump at its highest speed for about an hour and gently tilt the PC at 45-degree angles to dislodge air pockets, and to mount the system so the pump is not the highest point in the loop.
The Short Version
Back up your data. Unplug and label the cables. Pull the graphics card and any air cooler over 700 grams, bag them, pad them and pack them separately. Leave the side panels on, pad the tower, and lay it motherboard-side-down on the car floor wedged with blankets. Reseat everything before the first boot. Do that and a two-hour drive is a non-event. You can browse cases, bags and protective supplies in Newegg’s computer case listings.
Frequently Asked Questions
Do I really have to remove my graphics card to move my PC? For a genuine move, yes. Corsair’s guidance is that modern cards are heavy enough that bumps make them flex and strain the PCIe slot. No manufacturer publishes a specific weight or length cutoff, so treat card removal as the default for any trip longer than carrying the PC between rooms.
Should I take the CPU cooler off too? Noctua recommends removing air coolers with a total weight above 700 grams including the fan, which covers most large dual-tower heatsinks. All-in-one liquid coolers can stay installed; only custom open loops need draining.
What position should the PC travel in? Horizontal, motherboard side down, on the floor of the vehicle, wedged with towels or blankets so it cannot slide. That keeps remaining component weight pressing into the board and stops the tower moving under braking.
Should I remove the side panels for the move? No. The panels are part of the case’s structure and the surface your padding works against. Keep tempered glass bolted in place and pad it from the outside.
Read More
- Corsair: How to Transport a Gaming PC Safely — A tiered guide from original-box packing up to custom foam hard cases.
- Noctua: Should I Remove the CPU Cooler Before Transport? — The manufacturer’s published 700-gram cooler weight threshold.
- PC Gamer: How to Move Your PC — Step-by-step packing and vehicle placement advice.
- iFixit: Electrostatic Discharge — How static actually damages components and what genuinely prevents it.
- Newegg: Computer Cases — Browse compact and handled chassis by form factor and size.