
With the quarantine forcing everyone to stay inside, people are seeking out new types of content to keep themselves busy. Many creators are starting a podcast or going live on Instagram, but you could make something much more interesting than that.
Have you ever wanted to do a LIVE talk show, but weren’t sure you could figure out a switcher board? It’s way easier than you think! If you have a working computer, all you need is a camera, some broadcaster software, and an HDMI converter (maybe). While streaming games is easy (all you really need is a free program like OBS and a webcam, for that), this guide will walk you through more advanced options, to really push the limits of what YouTube and Twitch can do.
Visit Newegg’s Work From Home Portal for a full selection of hardware and more tips.
#1: Equipment – Lights, camera, sound!
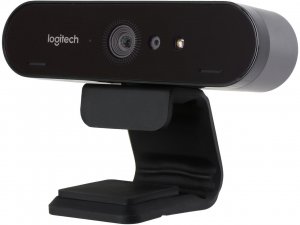
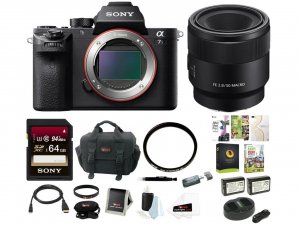
First up is the camera. You probably already own some kind of camera, but if you don’t, the least expensive professional-quality 4K camera is the Blackmagic Pocket Camera, which gives a cinematic look, or a Sony α7s that performs especially well in low light. Combine either of those with a 4K Logitech Webcam and you have a simple multi-camera streaming setup. You’ll be able to use the webcam as a close-up camera and the pro-level camera as the wide “establishing” shot.
 Logitech BRIO C100e
Even a great camera only looks so good when your lighting isn’t great, so you’ll want a few lights to improve the look of your stream. I recommend a lighting kit with three lights, like the one linked, but if you wanted to make your lighting more interesting, you could add two additional lights for more variety.
Finally, you’ll need something to record sound. Grab a Sennheiser Wireless Lavalier and you’ll be able to feed your audio directly into the pro camera. If a wireless lavalier is too expensive for you, check out the Blue Yeti microphone, a classic in the creative community, which will plug directly into your computer.

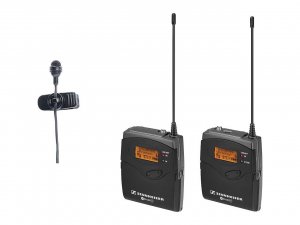
Sennheiser Wireless Microphone System
If needed, Newegg Insider has more in-depth coverage of Lighting a Home Studio.
#2: Setting it up
Once you have the equipment together, it’s pretty easy to set up. Choose where you’ll be staging your show and place a chair as a point of reference. Point your webcam and Pro camera at the chair and light the chair using a three-point lighting setup. If you’re having trouble viewing what it all looks like in the small camera viewfinder, you can connect your camera to any modern TV with an HDMI cable and use it as an external monitor. For a list of HDMI adapters, see below.
HDMI Adapters
- For mirrorless or DSLR cameras (Sony α Series, Pansonic LUMIX): mini-HDMI to HDMI
- For cinema cameras (Sony F Series, Blackmagic, RED): SDI to HDMI
Set the frame to your liking with all the furniture and set dressings you’ll be using, and make sure the set looks how you’d like.
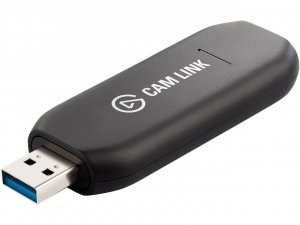
Next, you’ll use the video feed as an input for your computer. The problem here is that most computers don’t have an HDMI input. Grab the HDMI cable from earlier and plug it into something like the Elgato Cam Link.
#3: Software and streaming
Now you’re ready to take this thing live! The best substitute for real video switching hardware is an open-source program called OBS (Open Broadcaster Software). OBS can be a little confusing to explain, so I recommend watching the following video tutorials on OBS Basics and Studio Mode.
In OBS, under “Sources,” add a “Video Capture Device” source for each of your cameras. In our example, that would be our webcam and pro camera. Then make sure the audio feed is set to come from the camera audio of your pro camera, unless you’re using a USB mic, in which case you’d set as the audio source instead.
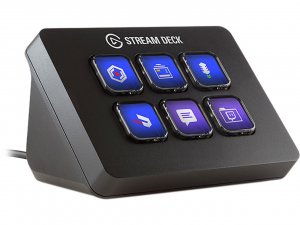
To switch between cameras, you’ll need to click the video sources in the software as needed. If a physical video switcher is appealing to you, check out the Elgato Stream Deck for a great option that isn’t too expensive.
As you get more comfortable with streaming, you can always get more flashy with custom scenes, unique transitions, and overlapping audio tracks. Who knows, you might want some background music! An Elgato Stream Deck will make all of that very easy to do.
 Elgato Stream Deck Mini
That’s really all you need. It’s that easy!
To go live, you’ll go to your preferred streaming platform (Twitch, YouTube, Periscope, etc) and follow their steps to set up a live stream. Each platform will give you what’s called a “Stream Key,” which you can input into OBS under Settings > Stream to make future streams more seamless. Once you’re ready to go, click “Start Streaming’” in the bottom right corner of OBS, and you’re LIVE!
Visit Newegg’s Work From Home Portal for a full selection of hardware and more tips.