Variable refresh rate (VRR) technology is one of the most impactful features on any modern gaming monitor — but it doesn’t activate automatically out of the box. Both G-Sync and FreeSync require deliberate setup steps across your monitor’s OSD, your GPU control software, and in some cases your game settings. Skip any step, and you’ll miss out on tear-free, stutter-free gaming entirely.
This guide walks you through exactly how to enable G-Sync or FreeSync on your monitor in 2026 — covering both NVIDIA and AMD setups, cross-compatibility scenarios, and how to verify that VRR is actually working.
Understanding What You’re Enabling
Before diving into settings, it helps to clarify what G-Sync and FreeSync actually do — and what they don’t do automatically.
Both technologies make your monitor’s refresh rate dynamically match the frame rate output of your GPU. When your GPU outputs 87 frames per second, a VRR monitor refreshes at exactly 87Hz — eliminating the screen tearing that occurs when frame rate and refresh rate fall out of sync. Without VRR, your only options are accepting screen tearing or enabling V-Sync (which adds input lag as a trade-off).
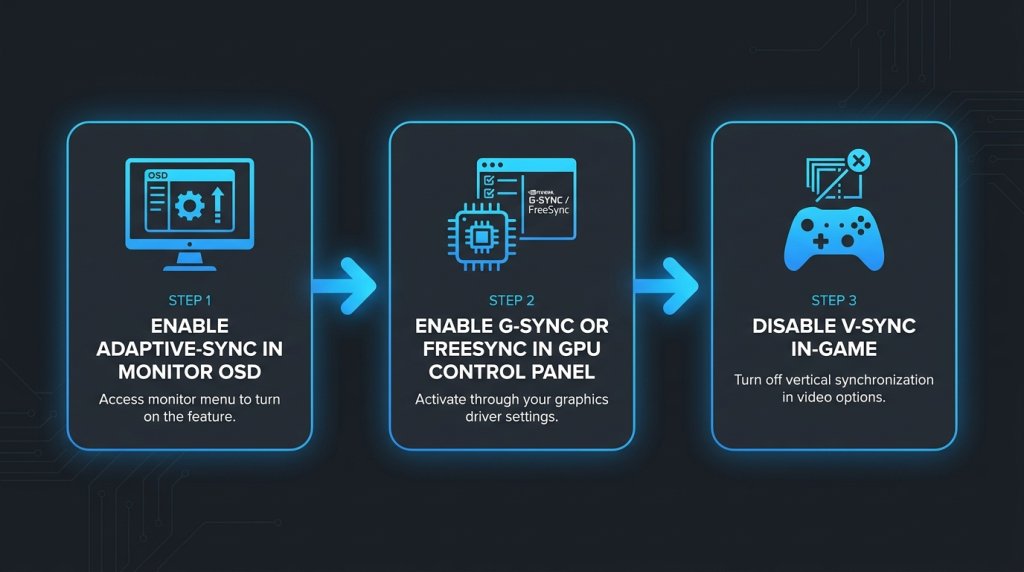
Neither G-Sync nor FreeSync activate automatically when you plug in a compatible monitor. All three of the following must be true before VRR works:
- The monitor has VRR enabled in its OSD
- The GPU control software has VRR enabled
- Your cable and connection support the bandwidth required
Part 1: Enabling FreeSync (AMD GPU Setup)
FreeSync is AMD’s implementation of the VESA Adaptive-Sync standard.
Step 1: Enable FreeSync in the Monitor OSD
Access your monitor’s OSD (On-Screen Display) using the physical buttons or joystick on the monitor bezel. Navigate to:
- Display Settings or Game Settings or Adaptive Sync section (naming varies by brand)
- Find FreeSync, Adaptive Sync, or Variable Refresh Rate toggle
- Set to On or Enabled
Some monitors have multiple FreeSync tiers in the OSD — confirm FreeSync Premium or Premium Pro is selected if your monitor supports it.
Step 2: Enable FreeSync in AMD Software
- Open AMD Software: Adrenalin Edition
- Navigate to the Display tab
- Find your monitor under connected displays
- Look for AMD FreeSync toggle — set to Enabled
You should also verify that the FreeSync range shown matches your monitor’s specifications (e.g., 48–144Hz for FreeSync Premium).
Step 3: Verify in AMD Software
Return to the Display tab — AMD Software shows a status indicator confirming FreeSync is active. A green “On” status confirms the handshake between GPU and monitor is complete.
Part 2: Enabling G-Sync (NVIDIA GPU Setup)
G-Sync from NVIDIA comes in three tiers with slightly different setup requirements: G-Sync Compatible (software-certified), G-Sync (proprietary hardware module), and G-Sync Ultimate (enhanced module with HDR).
Step 1: Enable in Monitor OSD
For G-Sync and G-Sync Ultimate monitors — the OSD typically has an explicit G-Sync toggle under Display or Setup options. Enable it.
For G-Sync Compatible monitors — the monitor may show “Adaptive Sync,” “FreeSync,” or “Variable Refresh Rate” in the OSD. Enable whichever option is present; the NVIDIA driver will handle the G-Sync Compatible overlay from the control panel side.
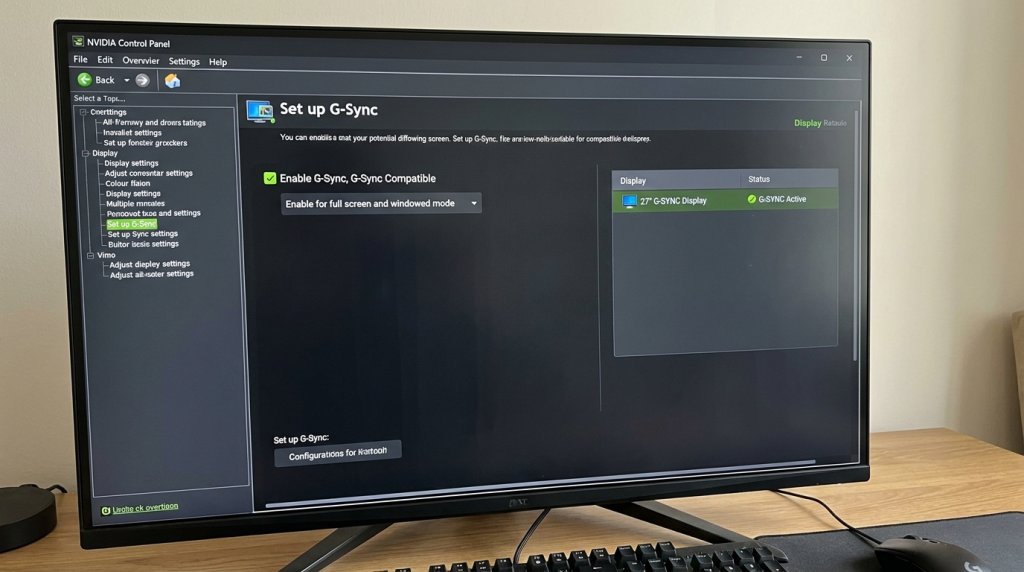
Step 2: Enable G-Sync in NVIDIA Control Panel
- Open NVIDIA Control Panel (right-click desktop → NVIDIA Control Panel, or via the NVIDIA App)
- Navigate to Display → Set up G-Sync
- Check Enable G-Sync, G-Sync Compatible
- In the dropdown below, select whether to enable for full screen mode only or full screen and windowed mode (the latter is useful for windowed gaming)
- Ensure your target monitor is selected in the display list
- Click Apply
NVIDIA App (2026): If you’re using the updated NVIDIA App rather than the legacy Control Panel, G-Sync settings are found under the Display section of the app with the same toggle and mode options.
Step 3: Confirm with NVIDIA Overlay
In the NVIDIA Control Panel, under Display → G-Sync Indicator, you can enable an on-screen visual indicator that shows a colored overlay when G-Sync is actively engaged. Green means active — useful for confirming VRR is running during gameplay.
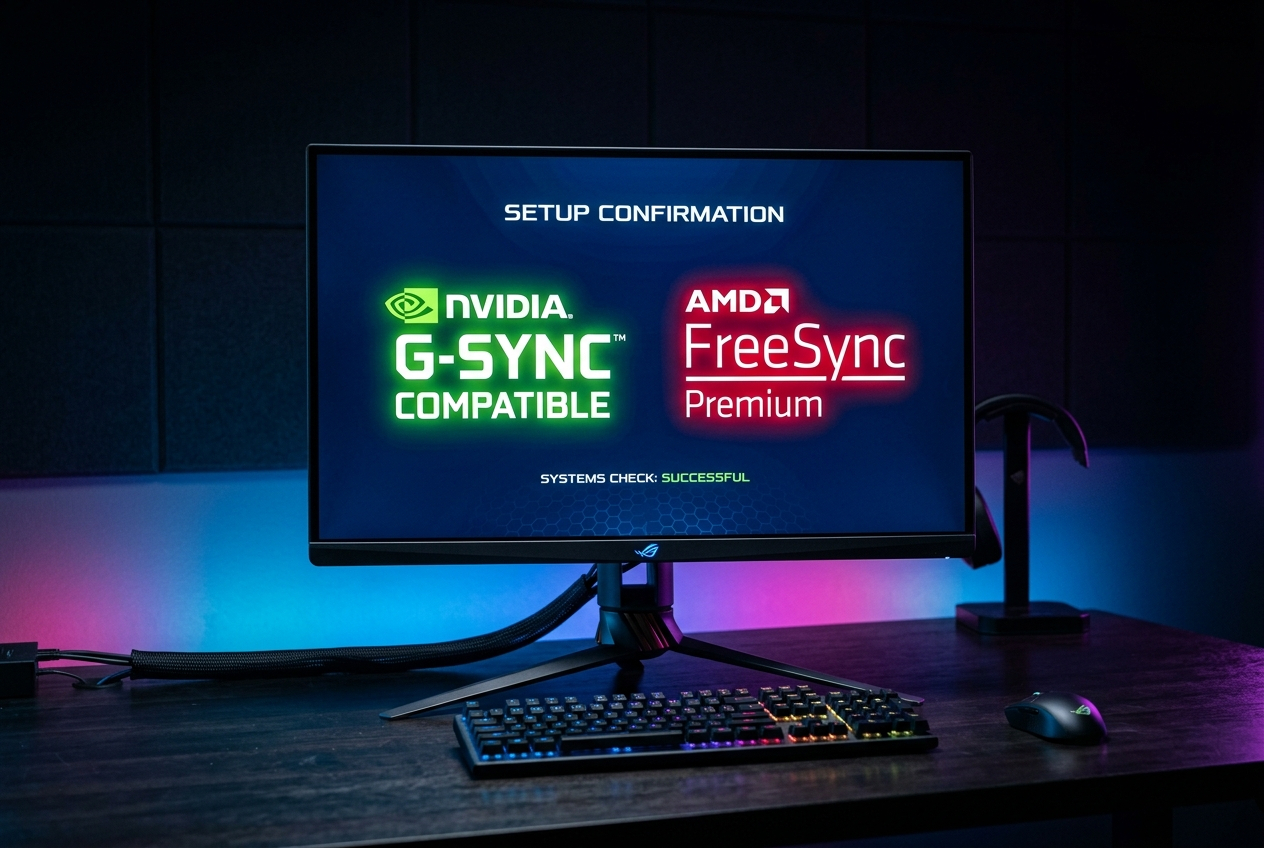
Part 3: Cross-Compatibility Setup (FreeSync Monitor + NVIDIA GPU)
In 2026, NVIDIA GPUs support Adaptive-Sync, meaning FreeSync monitors work with NVIDIA cards via the G-Sync Compatible pathway. Setup:
- Enable Adaptive-Sync / FreeSync in monitor OSD (same as Part 1, Step 1)
- In NVIDIA Control Panel → Set up G-Sync → Check Enable G-Sync, G-Sync Compatible
- NVIDIA will detect the FreeSync monitor and apply Adaptive-Sync VRR through the G-Sync Compatible framework
Note: Not every FreeSync monitor is certified G-Sync Compatible by NVIDIA. Certified models are guaranteed to pass NVIDIA’s VRR validation tests. Uncertified models may still work but without the official quality guarantee. Always check NVIDIA’s G-Sync Compatible monitor list for confirmed support.
Part 4: Enabling VRR in Games
Even with VRR correctly configured at the system level, some games require game-side settings to maximize the benefit:
V-Sync interaction: With G-Sync or FreeSync enabled, you should generally disable V-Sync in your game settings. Enabling both V-Sync and VRR simultaneously can cause stutter at high frame rates (V-Sync kicks in when frame rate hits the monitor ceiling, causing a frame queue). Exception: NVIDIA recommends enabling V-Sync in the NVIDIA Control Panel (not in-game) as a frame cap for G-Sync users.
Frame rate cap: Setting an in-game or NVIDIA/AMD frame rate cap to slightly below your monitor’s maximum refresh rate (e.g., 237 FPS cap on a 240Hz display) keeps VRR operating in the active range and prevents tearing at the ceiling.
HDR gaming monitors: If your monitor supports HDR + VRR, enable HDR in Windows Settings (System → Display → HDR) and confirm in-game HDR is activated. On OLED/QLED monitors, both HDR and VRR can be active simultaneously at supported refresh rates.
Verifying VRR Is Working
| Verification Method | How to Use |
|---|---|
| NVIDIA G-Sync Indicator | Enable in NVIDIA Control Panel → Display → G-Sync Indicator |
| AMD Overlay | AMD Software → Performance → Overlay (shows active refresh rate) |
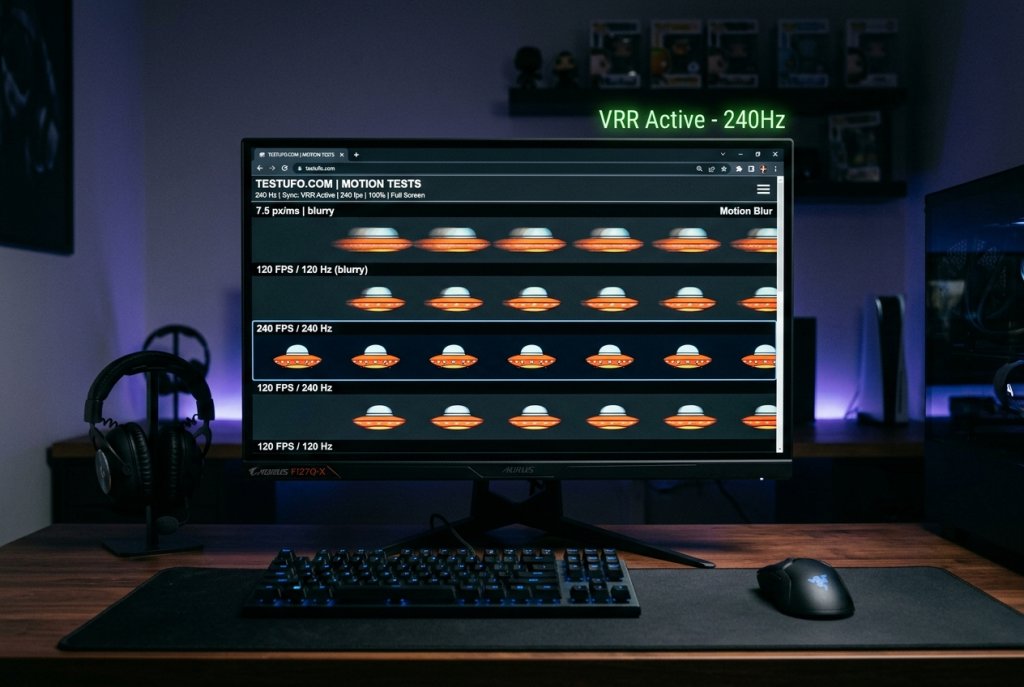
| UFO Test (testufo.com) | Browser-based VRR frame test — confirms smoothness at variable frame rates |
| HWiNFO | Shows real-time GPU output frame rate vs monitor refresh rate |
| In-game frame counter | Compare in-game FPS to known monitor max — if they match dynamically, VRR is active |
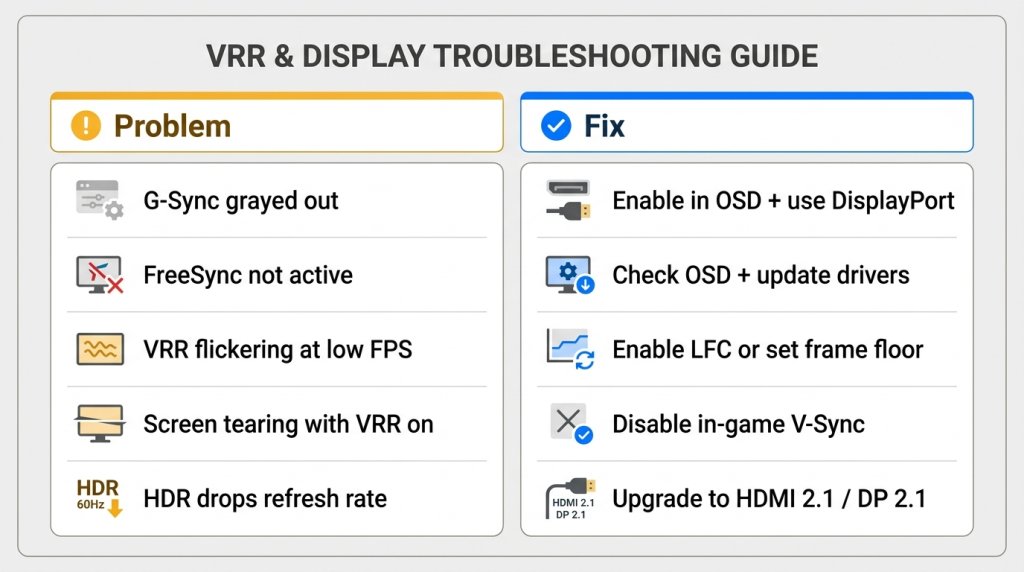
Troubleshooting Common Issues
G-Sync option grayed out in NVIDIA Control Panel: → Confirm the monitor OSD has Adaptive-Sync or G-Sync enabled → Verify the connection uses DisplayPort (G-Sync requires DisplayPort; HDMI support varies by model) → Update NVIDIA drivers to the latest version
FreeSync not showing as active in AMD Software: → Check monitor OSD — FreeSync may be off or set to a different Adaptive-Sync mode → Ensure DisplayPort or HDMI 2.1 connection (some FreeSync features require specific ports) → Reinstall AMD drivers via clean install
VRR causes flickering at low frame rates: → This occurs when frame rate drops below the monitor’s minimum VRR range floor → On FreeSync Premium monitors, Low Framerate Compensation (LFC) should handle sub-floor frame rates — confirm LFC is supported → Set a frame rate floor using AMD or NVIDIA frame cap tools
Curved ultrawide monitors and large 33+ inch displays: VRR setup is identical — the process does not change based on monitor size or aspect ratio. Bandwidth requirements may be higher for high-resolution large panels.
The Bottom Line
G-Sync and FreeSync are transformative for gaming smoothness — but only when correctly enabled at every level of the signal chain: monitor OSD, GPU software, and in-game settings. Follow the steps in this guide, verify with the G-Sync indicator or AMD overlay, and run the UFO test to confirm. Once active, the difference in gameplay smoothness is immediately apparent and makes every subsequent gaming session feel fundamentally better.
Related Posts
- Gaming Monitor Size Guide 2026: Choosing Between 24, 27, and 32 Inches
- Five Mac Studio Display Alternatives
- LG dazzles with new monitors and a 48-inch G-SYNC + FreeSync OLED gaming TV at CES 2020
- Samsung announces new gamer-focused CRG5 monitor at E3 2019
- Nixeus NX-EDG27 v2 Gaming Monitor: Stellar, Affordable FreeSync at 144Hz and 1440p