So, you’ve graduated from being a pad warrior and joined the thousands of other pro fighting game players that use an arcade-style joystick – but it’s still not quite enough for you. You can’t use just any joystick. You need to use YOUR joystick, a weapon of battle customized specifically for you.
Unfortunately, MadCatz doesn’t stock “joysticks made for Steve,” so you are just going to have to make it yourself.
For the uninitiated, you may be thinking that building an arcade stick is impossible. After all, that’s what major brands like MadCatz and Hori are for, right? On the contrary – building an arcade stick is much easier than it appears. With a little bit of technical know-how, the right tools, and good old fashioned elbow grease, you can build a fully customizable, easy-to-repair arcade stick for a fraction of the cost of buying one.
The Basic Components of an Arcade Stick
Part customization is the main draw of building your own arcade stick. Unfortunately, it’s hard to tell which parts you like the most without a little bit of experimentation. There’s no correct choice here, just a lot of different, equally valid options.
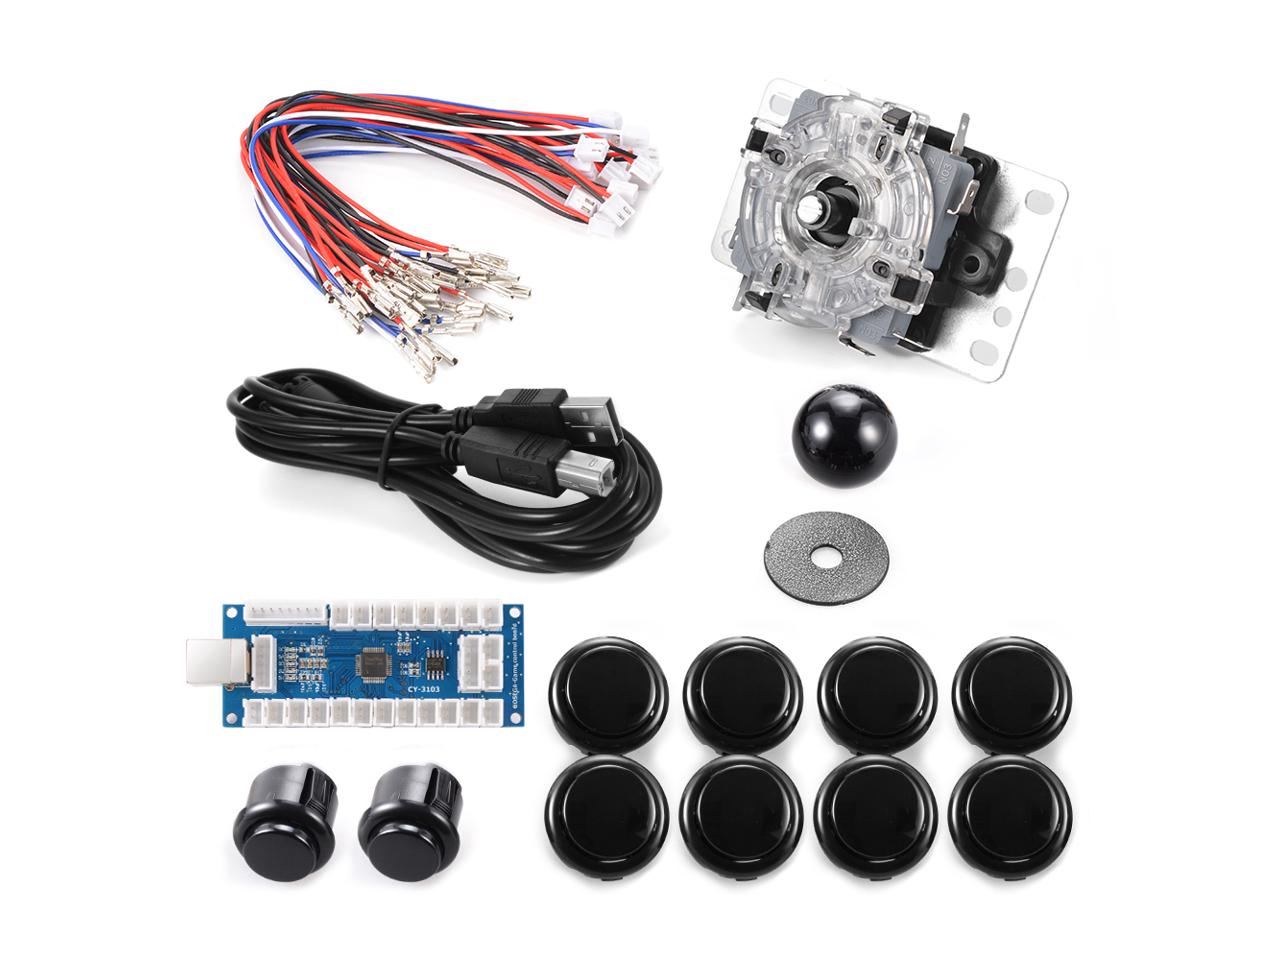
If you aren’t a stickler for parts and just want to get used to the stick building process, we recommend buying a Do It Yourself Kit. Kits like these include all the important components of a joystick (except the case) bundled together for cheap! You can usually find them for around 30-ish dollars, give or take, which is far less than you would pay for each part individually.
The Joystick
Most joysticks come fully assembled and ready to be put into your build of choice. One of the most popular joysticks around is the Sanwa JLF. This is the joystick you’ll find in most pro-level retail sticks. I personally find it to be the best joystick on the market, but other people swear by Seimitsu brand sticks, or even American made joysticks.
Which one you choose is largely up to personal preference, but the basics remain the same. Your joystick will come with a mounting plate, a restrictor gate, a joystick top, and four wires, each corresponding to a different direction. The mounting plate is what you will eventually screw into or otherwise attach to your joystick case.
The restrictor gate determines where your joystick can move. The two most commonly used in the pro gaming community are square gates, which is what most professional sticks use, and octagonal gates, which give your arcade stick less room to move but provide physical feedback when you hit a cardinal or diagonal direction. Once again this is up to personal preference.
The joystick top simply screws on and off. If you want a ball shaped top, a bat shaped top, or something completely different, just screw off the one you have and put a new one on. Finally, the four wires will be attached to our PCB (printed circuit board) to make the stick work.
Note that you don’t actually need to use a joystick at all. Anything that can register four different directional inputs will work just fine. You can, if you like, use buttons instead of a joystick to create your very own homemade Hitbox-style controller.
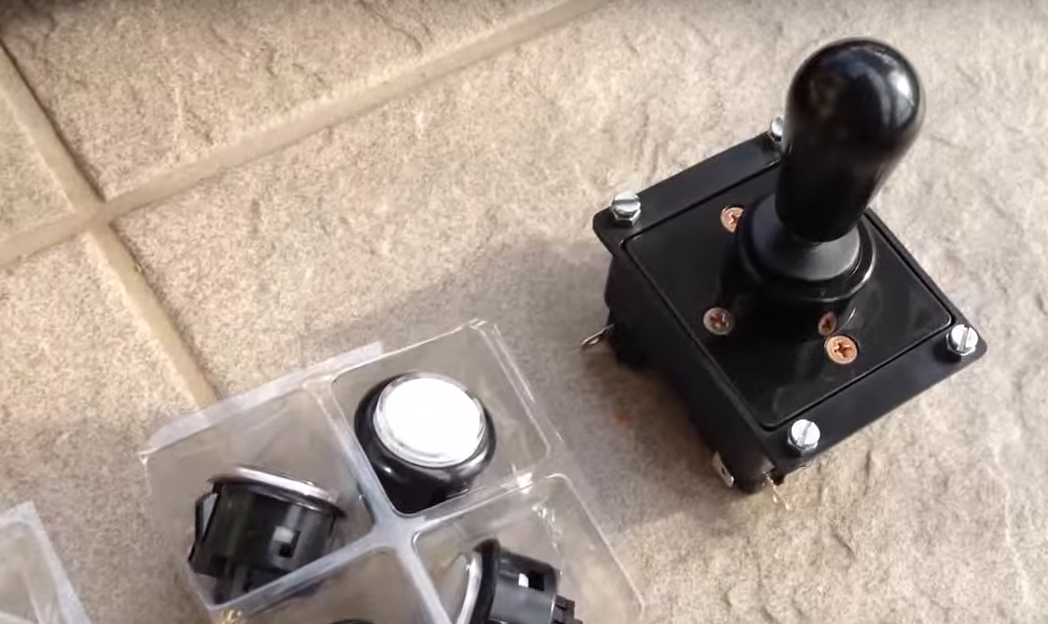
Image via aabyssx on YouTube.
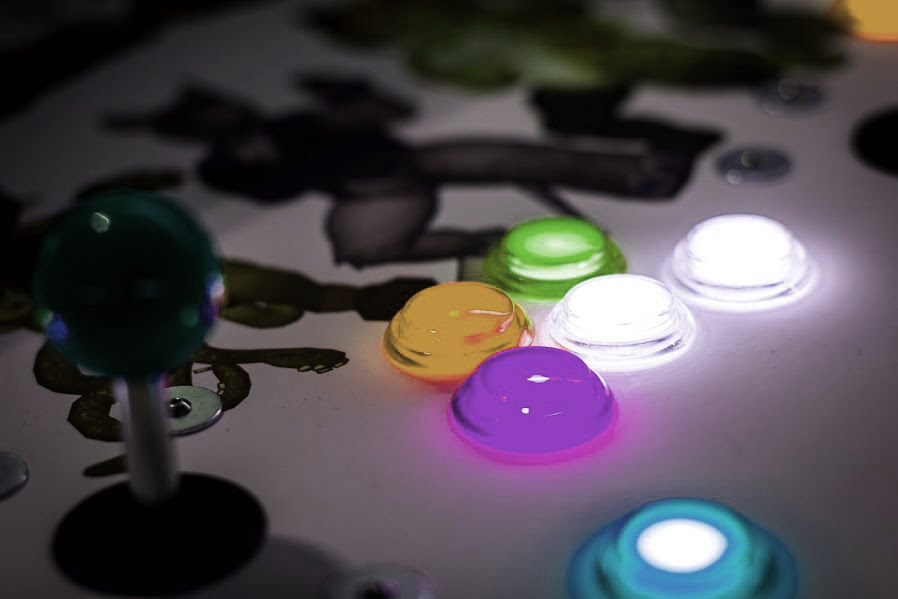
Buttons
You are going to need a button for every button you would normally have on a standard controller. Buttons are cheap, but varied, and the choices can be overwhelming. Once again, we see the age old Sanwa vs. Seimitsu vs. American manufacturer debate here. In general, Sanwa buttons are what you are used to in MadCatz and Hori sticks, Seimitsu buttons are a little bit stiffer and feel more like a keyboard key, and American made buttons have that hefty plunger click that we are all used to from our childhood arcade days.
But there are even more choices to make. What size buttons do you want? The standard is 30 millimeter, but some people like smaller or larger buttons. Do you want your buttons to screw in or snap in? Snap-in buttons are fine for thin cases while screw-in buttons are needed for thicker cases, such as ones made out of wood. Once again, you’ll only know what your preference is through trial and error. Since buttons are so cheap (usually retailing for a dollar or less), I recommend buying a couple of different buttons before embarking on your stick making project, just to see how they feel.
The Case
Believe it or not, the case is the most expensive part of any arcade stick build. You can find pre-made cases for about 60-70 dollars online, and some sites will even custom make your case for you. But really, any box will do. Some people have even made full working joysticks out of shoeboxes.
There’s no real industry standard when it comes to cases. Anything you can put holes into will work. Just make sure that: A) The holes in your case are the correct size for your buttons, B) You remember a hole for your joystick as well as a hole for the USB wire, and C) The material you use is sturdy enough to stand up to prolonged use. If this is your first time building, however, I recommend getting a pre-made case. It’s just easier for anyone still learning how to build.
The PCB
The PCB is the brain of your arcade stick. It’s what’s actually processing all of your button inputs, along with your console/PC. There are two main ways to get a PCB: purchase one or salvage one. Purchasing one ready-made is, once again, the easiest path for someone just getting started in arcade stick building. Ready-made PCB’s reduce the complex task of wiring to simple “insert tab A into slot B” instructions.
That being said, salvaging a PCB can be more cost effective, especially if you can get someone to give you a broken controller. When most console controllers break, it’s not the PCB that breaks, but the individual mechanical components. Many early joystick projects, before an industry was built around custom joystick creation, were made by salvaging the PCBs from these busted joysticks. If you can’t find a broken one, a crappy third-party knockoff controller is also a good thing to bust apart and salvage. Once again, it’s usually the mechanical parts that are inferior in these controllers, not the PCB.
Unfortunately, salvaging a PCB will require you to do some soldering, which is usually what people are intimidated by when they think of building their own joystick. Ready-made PCBs, however, only require a screwdriver.
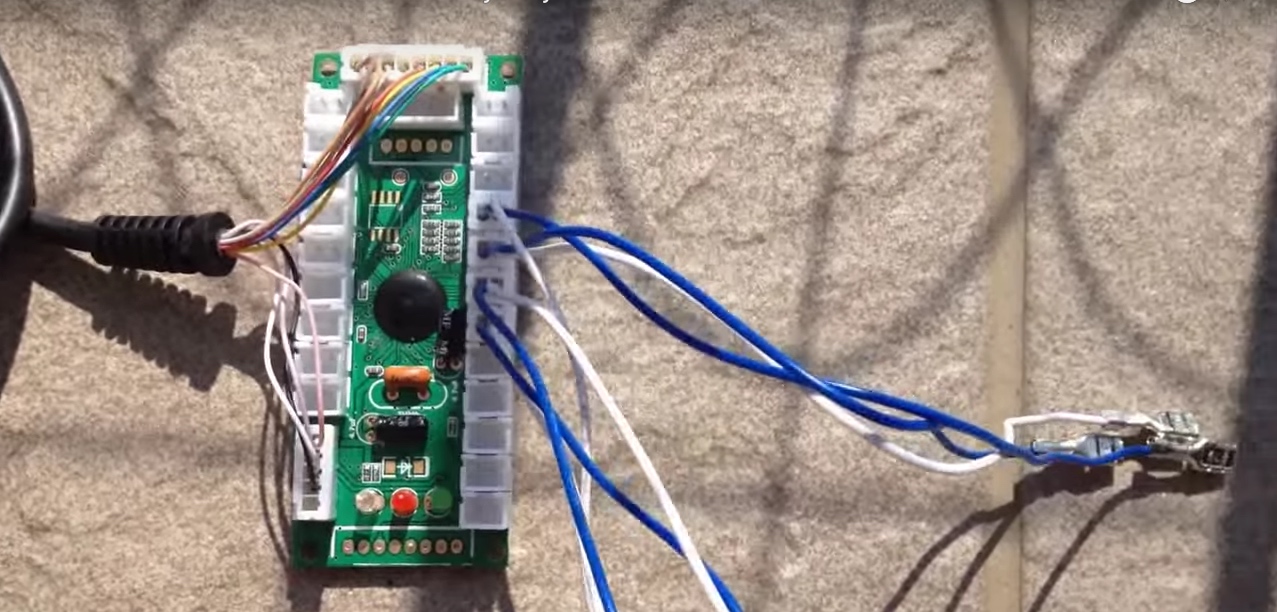
Image via aabyssx on YouTube.
Internal Wiring
You are going to need wires to connect all these parts together, and the reality is any old copper wire will do. However, for your own sanity you are going to want to use wire that is easy to deal with and hard to tangle. The industry standard is a 26 gauge wire, which you can buy a spool of for relatively cheap.
If you don’t feel like soldering, you’ll also want to invest in some “quick disconnects.” .110 x .020 quick disconnects will fit any Sanwa, Seimitsu, or American made button. Just be sure you get the right size. Oh, and if you are worried about price, don’t be. You can literally find these retailed for about 8-9 cents each.
Tools
Finally, you need some tools, though how many you’ll need will depend on the complexity of your project. If you buy everything ready-made, then the most you’ll need is a screwdriver and some wire crimpers/strippers. In fact, some DIY kits don’t even require the strippers. If you are attempting a more complex project you may need a soldering iron and wire, a drill to create holes in your case, wood glue if you are working with wood, paint, a multi-meter to fix shorts, and more.
If you are going the simple route, a screwdriver and a crimper/stripper combo can be procured for about 10 dollars. If you are doing something more complex, I don’t actually recommend going out and buying each tool if you don’t already own it. Instead, look for local machine shops and hobby toolspaces. Local colleges usually have a shop that they are willing to let the public use. This is a great way to gain access to tools you don’t normally have without spending extra money.
The Build
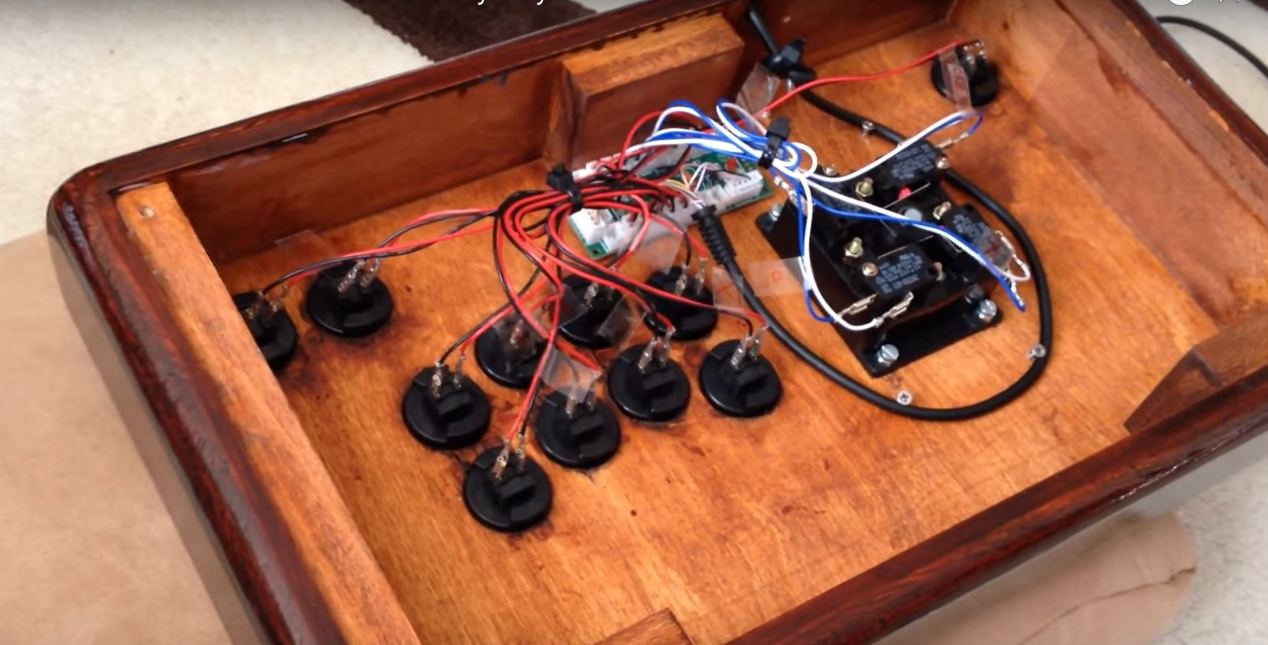
Image via aabyssx on YouTube.
After all that discussion of parts, you might be a little disappointed to realize that part selection was pretty much all the heavy work. Actually building an arcade stick is surprisingly easy.
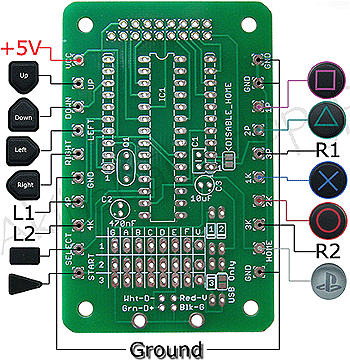
All an arcade stick (or really any controller) is is a device that completes electrical circuits. You probably covered electrical circuitry in a high-school physics class, but here’s all you really need to know: each component in your arcade stick needs to be attached to two players, the PCB and the “ground.” For our purposes, the ground is just another connection on your PCB.
Before you even begin, mount all your parts in your case – the buttons, joystick, etc. Put the parts in first. Once again, this is pretty simple. Mount the joystick by screwing through the holes in the mounting plate. Mount the buttons by snapping or screwing them in, depending on the type of parts you have. Either way, do all this physical arrangement first.
Then it’s time to start wiring. You’ll note that every button has two metal contacts on it. You’ll want to connect one contact from every button to the ground connection on your PCB. You’ll also want to connect the ground wire that is coming off your joystick to the ground connection on your PCB. You can actually do this by daisy chaining the buttons to each other, but you don’t have to. Ready-made kits will simply have you slip on quick connects to these buttons, and crimp wires into them with your crimping tool. Ready-made PCBs will ask you to stick a wire in a slot and screw down a connection on top of it. Anything more complex will require some soldering.
You might be wondering, “Where do I find the ground connection?” Well, most ready-made PCBs come with a wiring guide and/or are readily labeled to show which connection goes where. Salvaged PCBs will require a bit more research, but you can usually find diagrams for just about any PCB with a quick Google search.
Once you have connected everything to ground, now comes the fiddly part. You’ll want to connect the other contact of every button to its appropriate place on the PCB. So whichever button you want to use for X, that gets a wire connected to the X contact on the PCB. You’ll also need to do the same for every direction (up, down, left, right) on the joystick. Don’t forget menu buttons, like the home button!
After that… you’re done! No really, that’s all the work you need to do. Just close up your case, connect a USB wire, and start using your brand new home-made joystick. I told you it wasn’t so complicated!
Keep in mind that you are bound to make mistakes on your first few projects. Don’t be discouraged. Start small whenever possible. While soldiering in your own custom LED light display might seem like an awesome idea, it’s definitely not something to try on your first build.
Once you get the hang of wiring a simple arcade stick together, you can do all sorts of things with your know-how. From dual modding sticks to upgrading sticks from a previous generation to tweaking your parts to help you refine your motions, there really is no limit to your stick customization options. But the many weird and wacky things you can do with a custom-built arcade stick are, sadly, a topic for another article.
Related Posts
- How to Tune Your Gaming Desktop for Crimson Desert and Other Open-World RPGs
- Max Out the Fear: How to Optimize Your Gaming PC for Resident Evil Requiem and Other Survival Horror Hits
- 10 Best Prebuilt Gaming PCs for 2025
- What should you put in your gaming PC? Fall 2022 Edition
- Now you can sync your room lighting to the RGB in your PC build